I’ve never heard of stain shading before, so when I saw this project I was literally amazed. I started looking for some beautiful projects and was fortunate to get in touch with Misty.
So, today I would like to show you an amazing project created by Misty from Memaw’s House which is a very talented artist and agreed to share with us some more details on how to make a similar one.
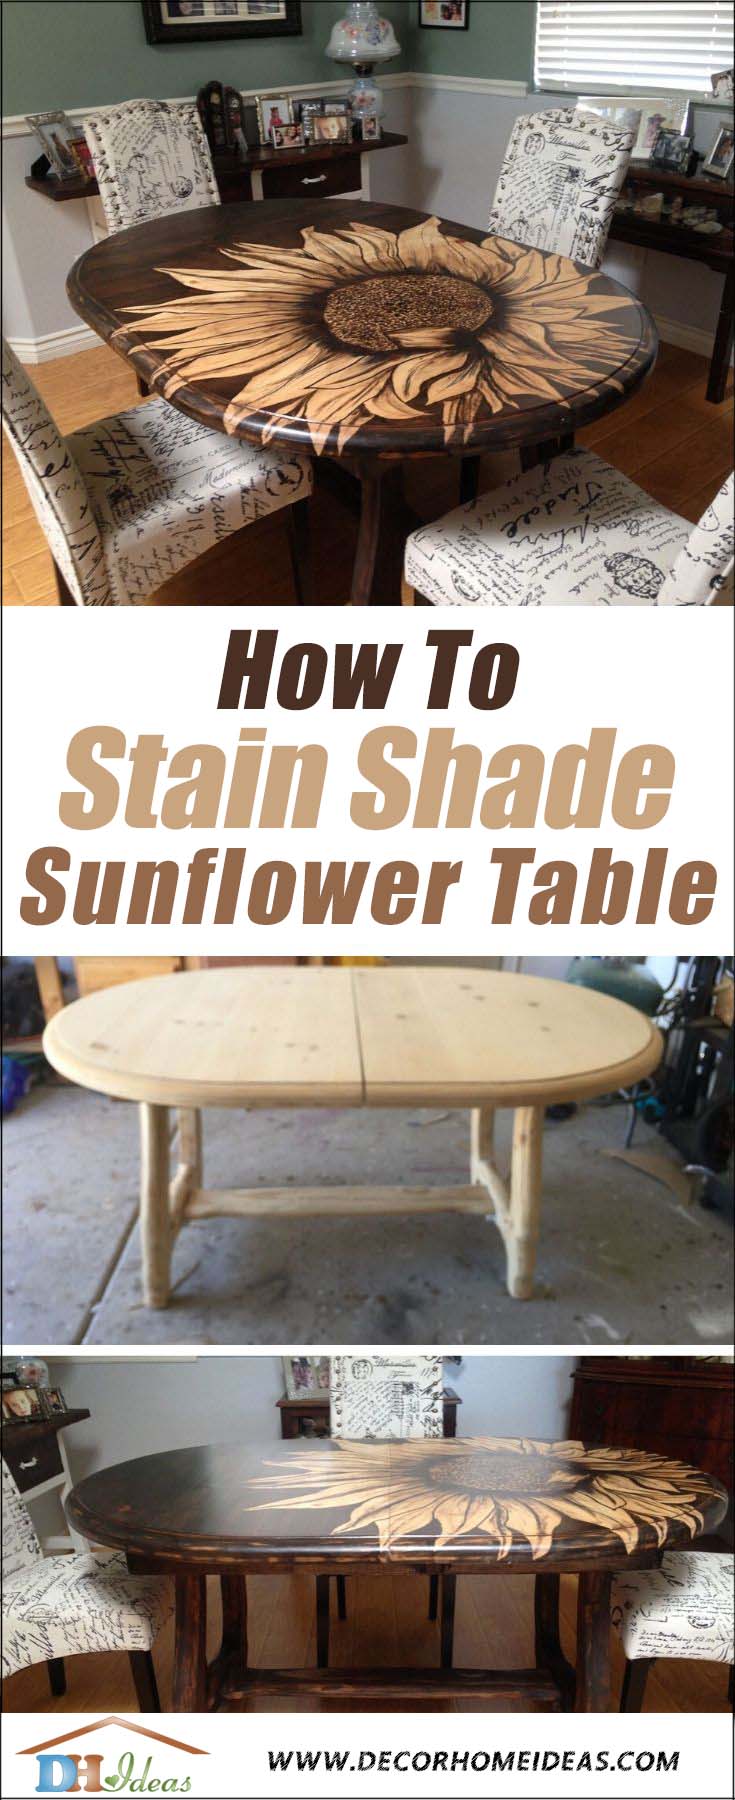
She loves to stain shading anything and everything she can and it looks like there is a good reason for doing so, as her projects are really cool.
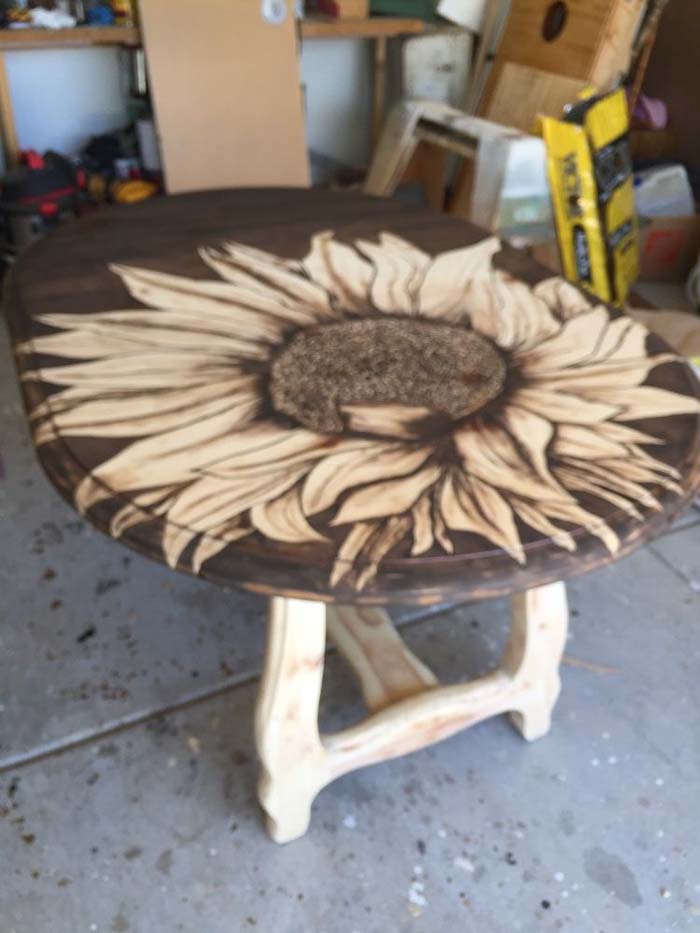
For this project she had a table top because she had used the legs for on another project and a base that she had sitting around just waiting for a top.
She feels it definitely leans towards the primitive style and she just loves how it turned out. So are we!
She has sent us a few pictures of the process.
She started by sanding the top using a 120 grit paper and did not go higher as she likes how 120 grit sized paper leaves the surface for shading a design.
It’s not too ruff which makes the stain bleed but it is smooth enough that when she is finished she gets a nice clear image and it seals perfect.
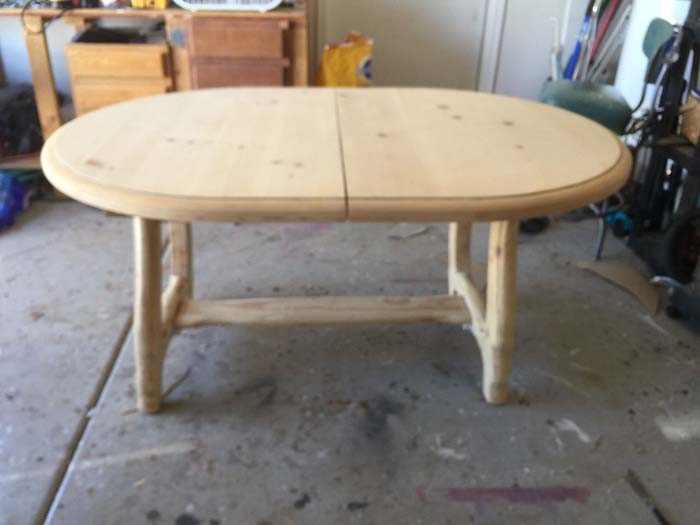
This is how it looks with all surfaces sanded and ready for the image to be applied.
She is drawing the sunflower on top freehand with a regular pencil, making sure to do it lightly.
As she adds the stain and finish the pencil marks disappear.
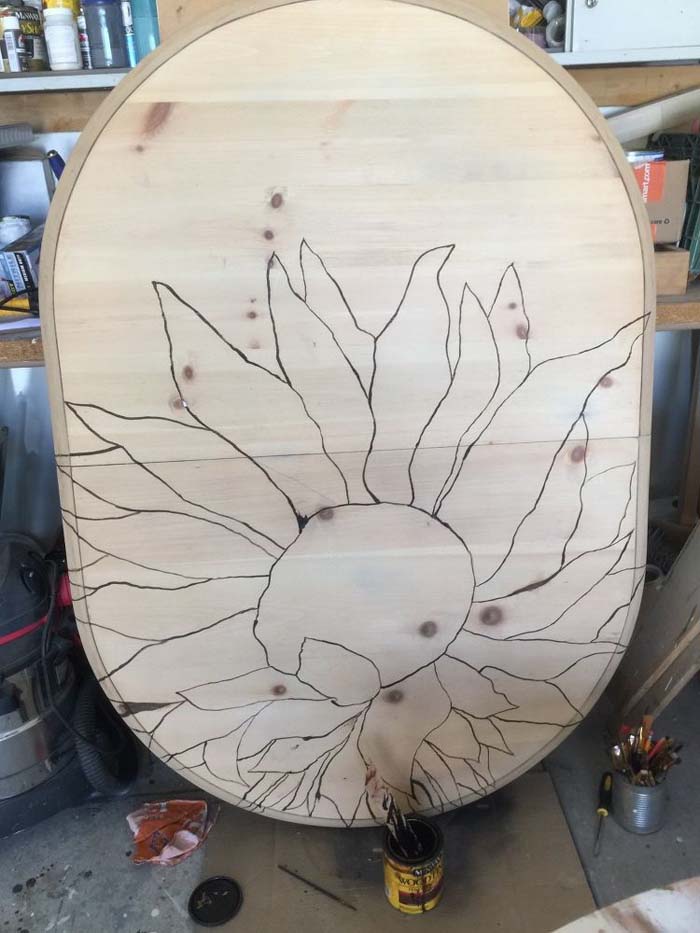
Table top is all set up to start shading with the stain.
Tip: Do not do this with a stain that has poly in it as it will not work and you will have a mess.
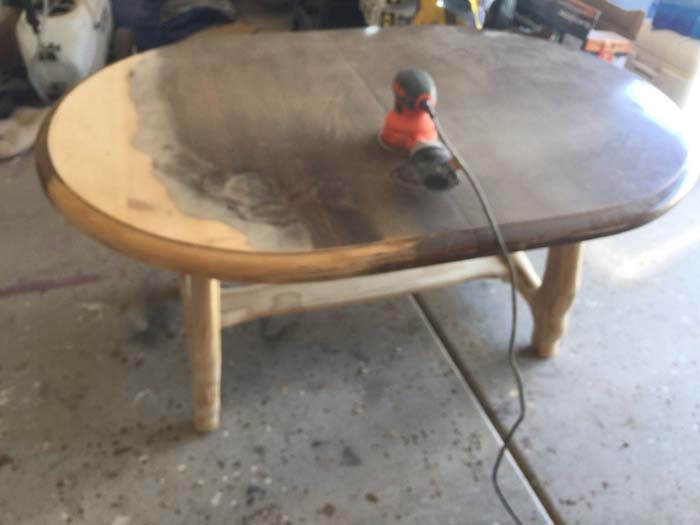
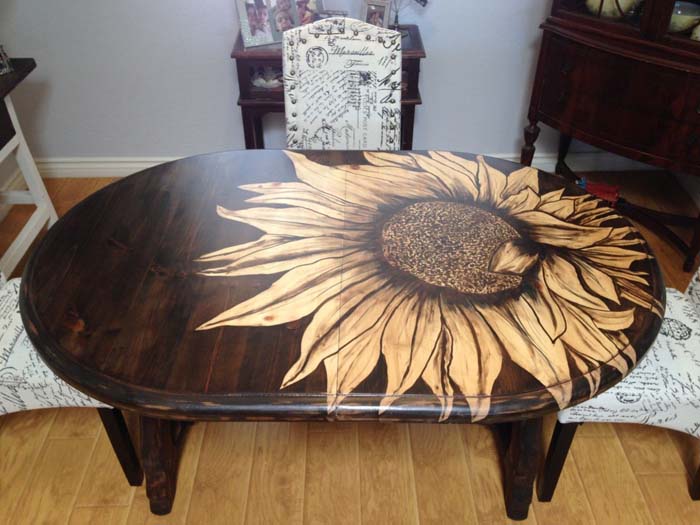
This photo is after first layer of stain is done. She usually goes over 2 times.
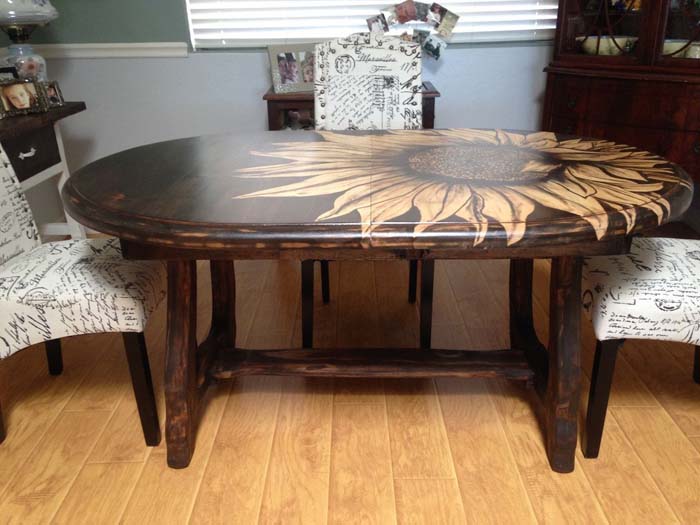
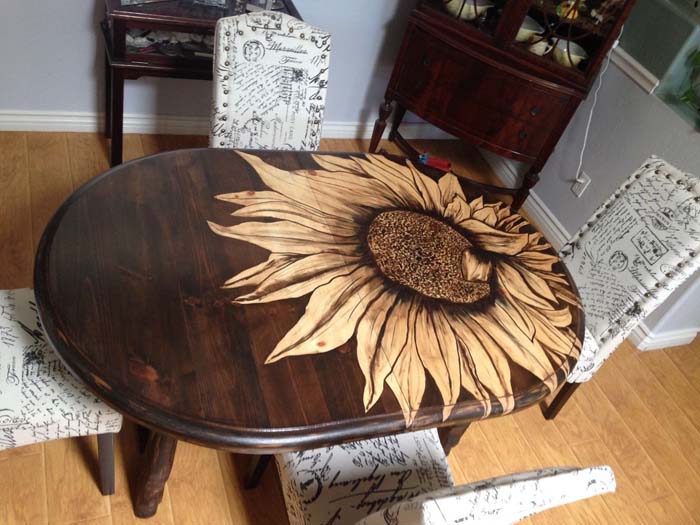
Finished. It’s sealed with Varathane poly acrylic, 3 coats.
Another shot of the table top.
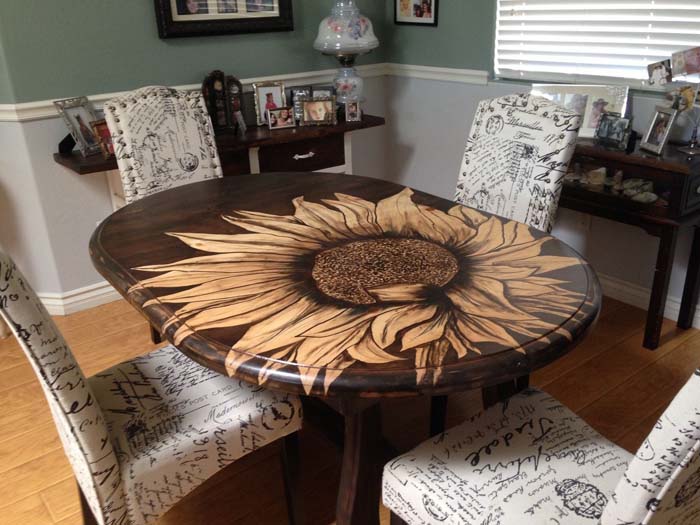
Looks incredible.
You can see more of her projects at Memaw’s House