There are many ways to stamp a personal style on your home, from framing a room’s character with flooring and paint colors to shifting a space from farmhouse to contemporary with furniture and fixtures. As for small décor pieces like drapery, plants, and wall hangings, they’re excellent for completing your home’s aesthetic.
The heart of your home, the kitchen, is an ideal space that offers a great canvas for displaying your individual style and décor, given that it’s a primary gathering space when sharing meals, planning dreams, or commemorating triumphs. And what better way to execute this than with a kitchen sign?!

Kitchen signs can be charming or creative, conveying messages of blessing, hope, and wisdom, and the 25 kitchen sign ideas that we’ll cover in this article will help reveal your personality to guests without ever speaking a word.
Take a look!
1. Give Guidance
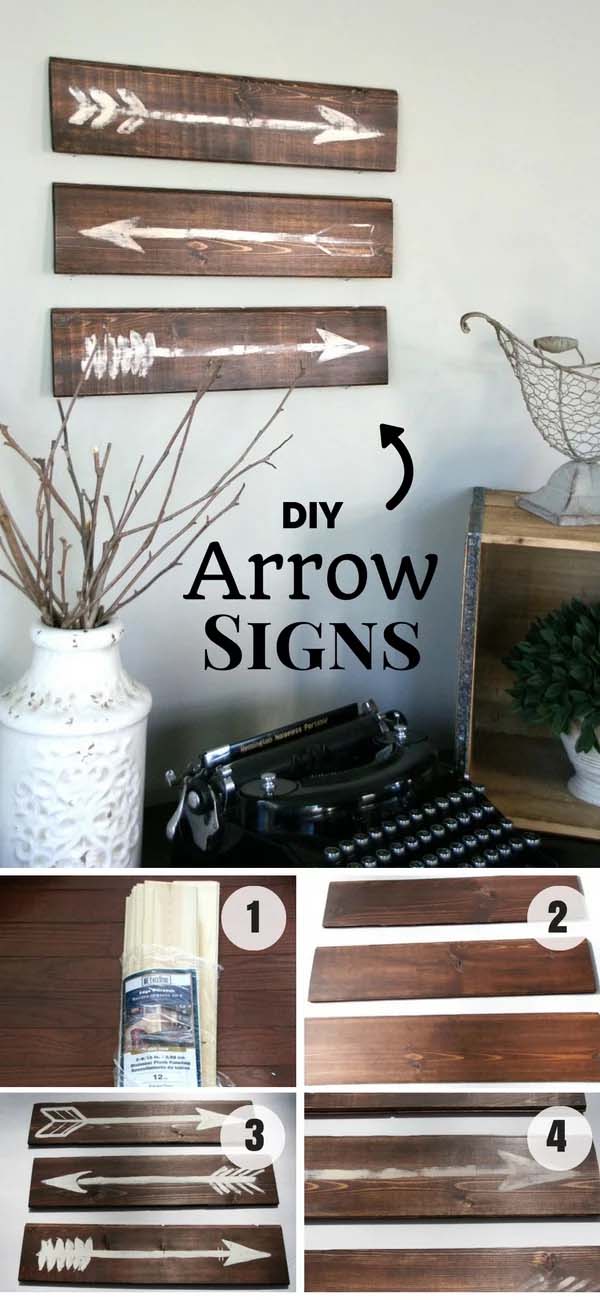
These DIY wood arrow signs create a rustic, yet polished focal point in this kitchen. You only need to find some craft wood or thin plywood and chalk paint—that’s it!
You can freehand the arrows to your desired design, then distress them with sandpaper before sealing them with clear wax to make your wooden arrow signs pop.
2. Show Some Appreciation
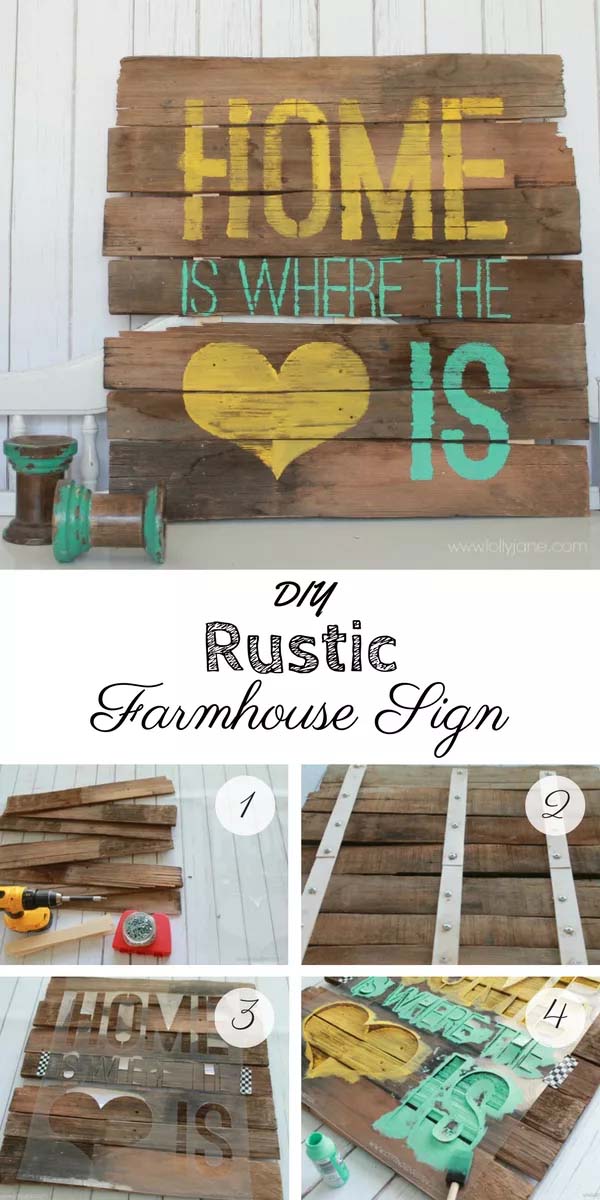
via Lolly Jane
Spruce up your rustic wooden kitchen signs with stencil art. Here, seven old wood slats are held together with wood shims to create a blank canvas. Since the wood planks are old, you must pre-drill them to prevent them from cracking.
Lay a stencil with a timeless message, in this case, “Home is Where the Heart Is,” over your black pallet canvas and secure it with tape. Look for your favorite colors, and use a foam brush to blot instead of sweeping across; this prevents leakage.
3. Welcome Fall
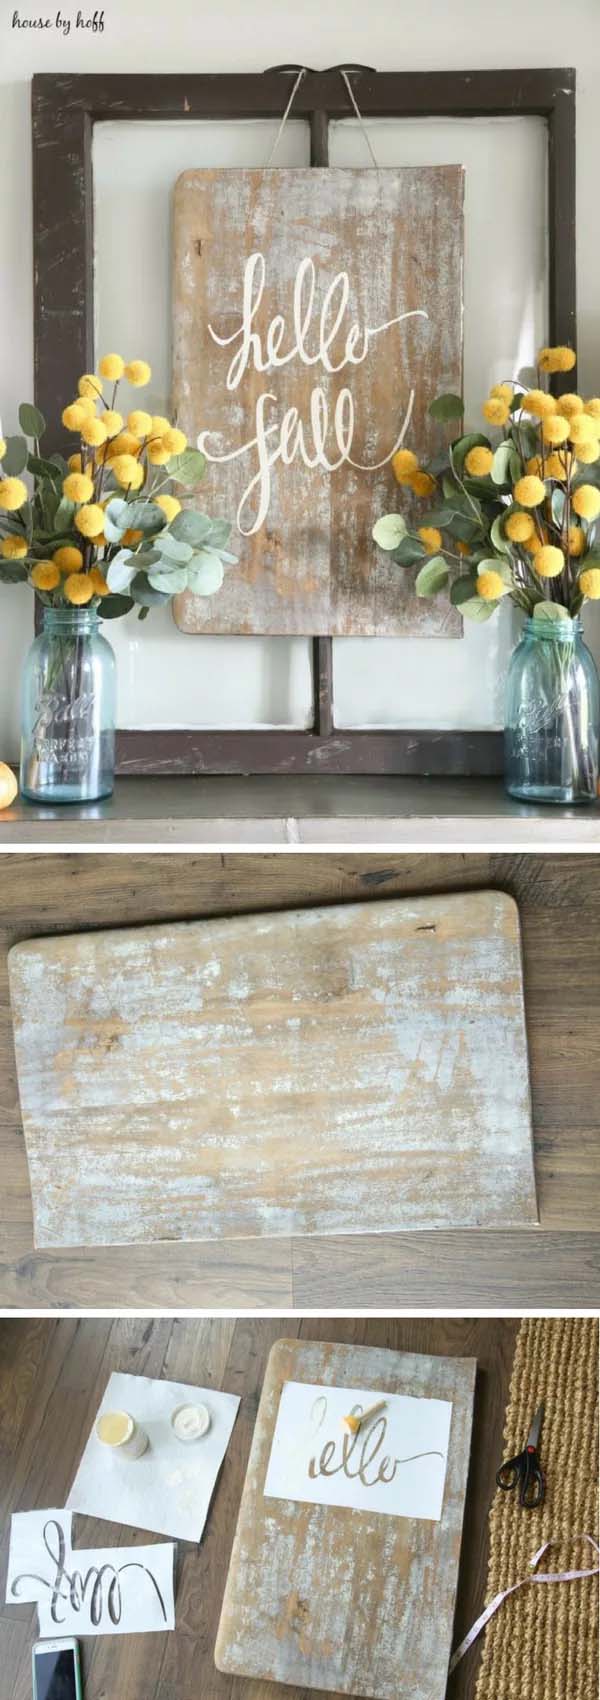
via House by Hoff
Incorporating modern-style calligraphy into your rustic wooden sign creates an eye-catching design, perfect for the kitchen, living room, or dining room. This particular sign was made using a rustic board from an old school desk and some chalk paint.
The fall welcome message was made using Silhouette Cameo’s vinyl stencil. You can use any paint you have if chalk paint isn’t available, and use a sponge brush to dab the paint. A tape measure will also be useful to keep the words centered.
4. Farmhouse Kitchen Signs
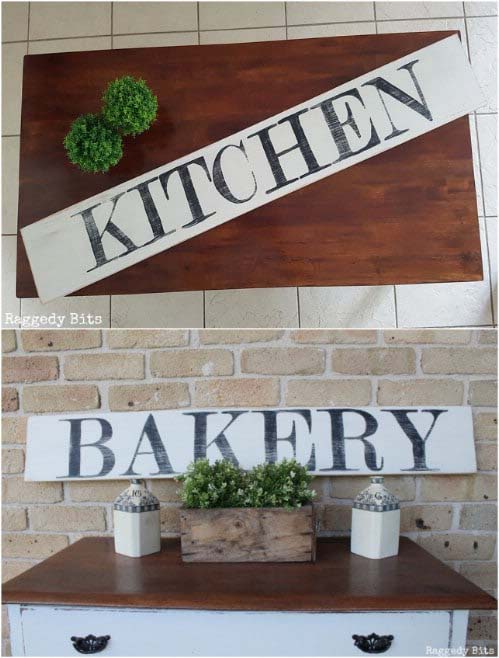
via Raggedy Bits
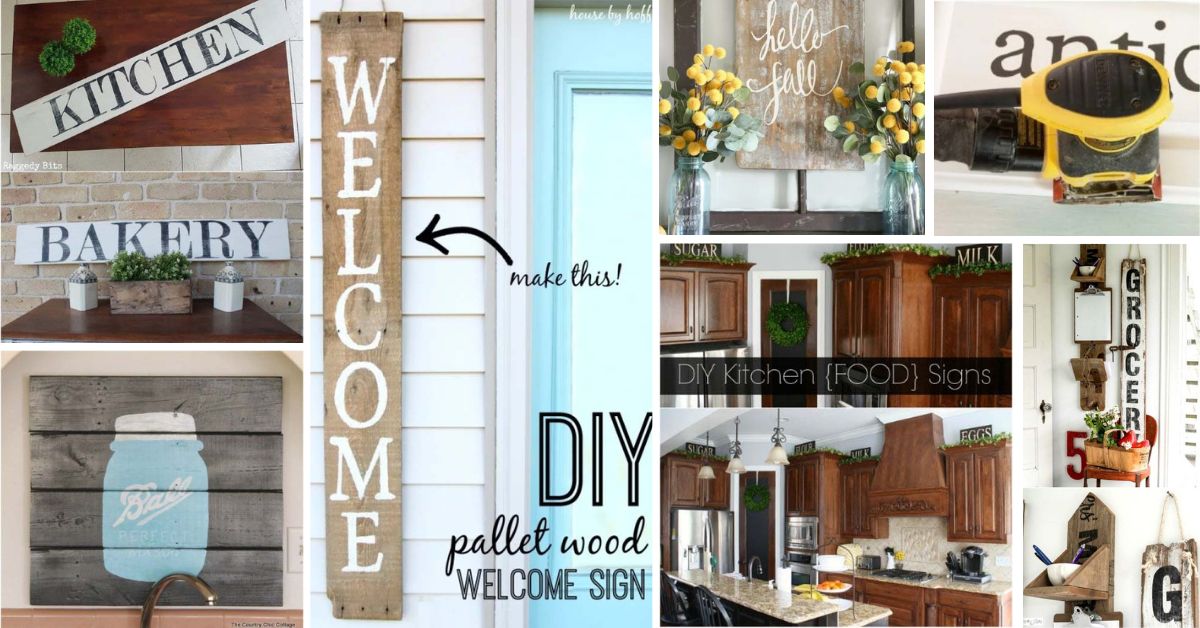
If you are seeking cute kitchen decorations, these farmhouse kitchen signs are an excellent way to bring that one-of-a-kind rustic charm. They’re made from painted pine wood and A4 printouts.
Simply print out the letters for the name you want on your sign, ensuring their height isn’t bigger than the wood’s, then tape them together to become one word. Begin tracing the letters on the wood board, and don’t press too hard, or you’ll damage the wood.
Use black paint to block the lettering, applying another coat once the first one is dry. Finally, distress the sign to your liking and apply wax to seal it.
5. Sell Your Apples
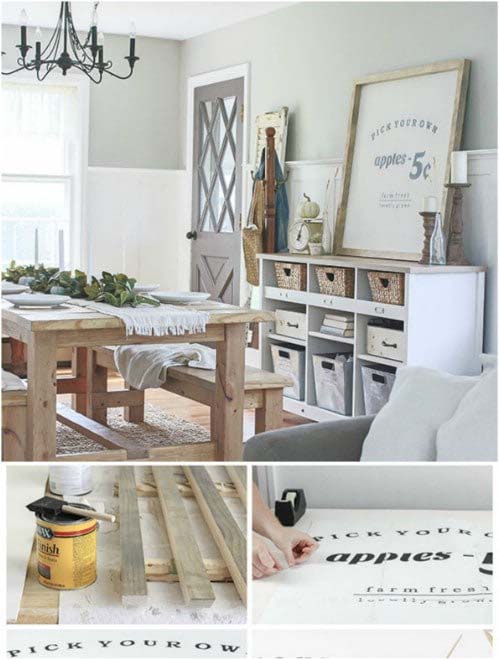
via Home Depot
This classic apple orchard sign is actually a DIY project and will only take a couple of hours in the afternoon to complete.
Purchase a sheet of plywood and cut it down to 3-ft. x 3-ft. with a circular saw while sanding any rough edges. Cut two 2 x 2’s into four 38-in pieces with a miter saw for the frame, ensuring each has a 45-degree mitered corner.
Paint the plywood with two coats of white chalky finish paint, then use your computer to create the wording. Trace the printed words onto the plywood using a pen, then use a small paintbrush to fill in the letters with black paint. Wear off some of the paint with sandpaper for a vintage look.
6. Stand it Up

via Sarah Joy
Whether you have an old kitchen or simply love the aesthetic of vintage signs, this rustic bakery sign will perfectly complement your decor. For best results, find a piece of rustic barn wood painted white; however, you can still paint the one you find with white paint.
Print out the letters “BAKERY,” cut them using scissors, and start taping them onto the wood, ensuring they’re evenly spaced out and at the center. Use a basic black acrylic paint and a small paint brush to bring your design to life, and even rough up the letters a bit with a hand sander for a more rustic look.
7. Showcase Your Family Values
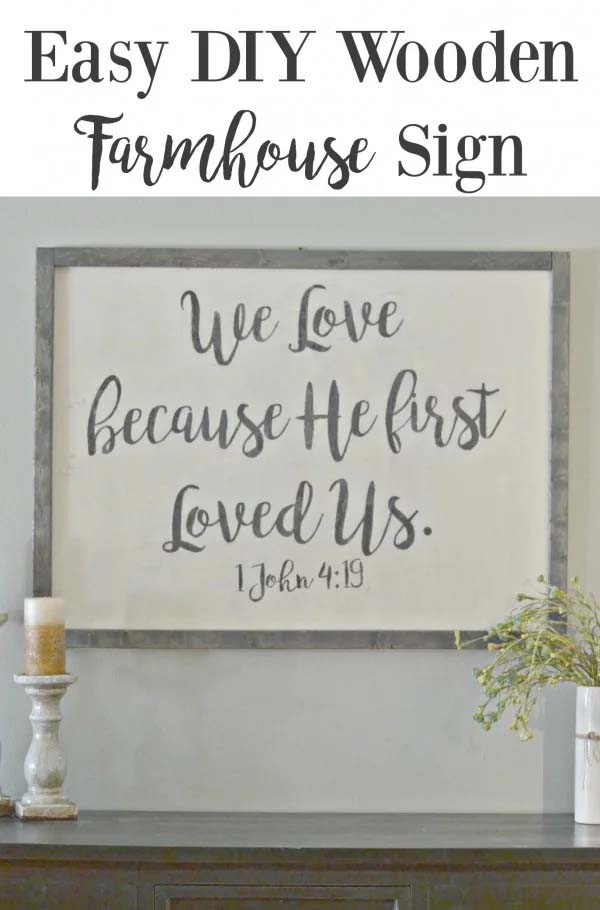
This wooden kitchen sign uses a Bible verse to reflect on what this family stands for. Apply chalk paint to a piece of plywood to create your canvas, then use an old t-shirt to stain wood studs for the frame. Once the studs are dry, apply them to the plywood using wood glue.
Find a verse or phrase that resonates with you, then using your favorite design app, print out your design in a poster size on regular printer-style paper, cutting off excess paper. Apply a generous amount of Modge Podge to your lettering before transferring it to your framed board.
Once the paper dries completely, take a wet rag and gently remove the back of the paper—the paper’s back layer will come off while the modge-podged letters will stay! Paint any spots that may have been pulled off wrongly to complete your design.
8. Make it Charming
via Liz Marie Blog
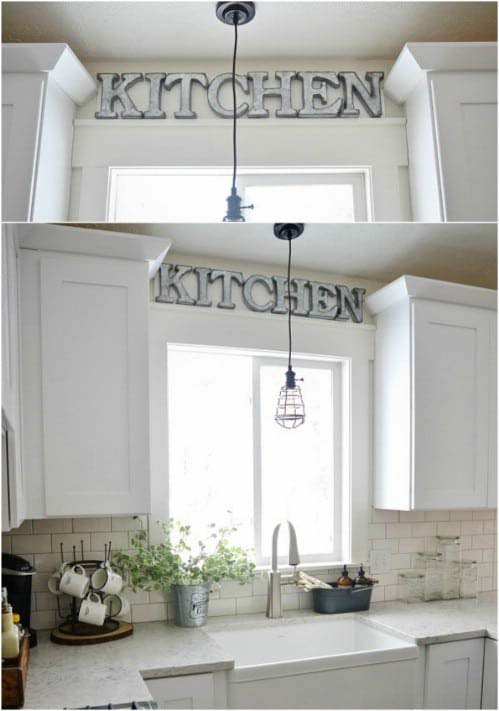
Consider this industrial kitchen sign for a charming display sign in your kitchen nooks. This sign is very easy to make since you only need to buy the metal letters from the nearest retail store.
First, cut a board the size of the space you want to utilize, in this case above the sink, and then paint the board a similar color to the wall to make it virtually invisible.
Place screws in the board to hang the letters from before hanging the sign in your desired space. This sign will guarantee an industrial farmhouse look in your kitchen!
9. The More, The Merrier
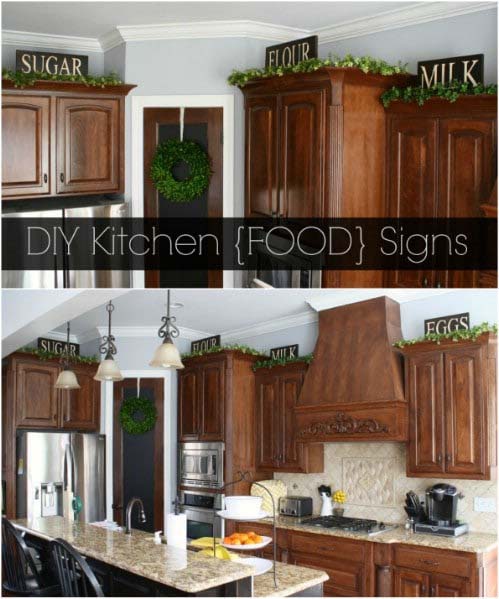
Why settle for one kitchen sign when you can use a couple to categorize your essentials while creating a unique display? The smooth matte finish on these DIY food signs gives the appearance of an artist’s hand-painted work.
You only need some pieces of wood, paint, and cut-out letters. First, paint your boards white before sticking the letters on them. Proceed to paint them black, wait for them to dry, and then carefully remove the letters. The green garlands make them stand out more against the rustic wood cabinets.
10. Inspire with a Quote

Who hasn’t borrowed a recipe from one of Julia Child’s cooking shows? Well, it sure isn’t us! This framed kitchen sign uses a quote from one of America’s first celebrity chefs to provide a subtle spot of casual wit.
You can DIY various signs using any number of quotes from your favorite cooking geniuses or check out pre-made ones from local stores—this one will cost you less than $40 on Etsy.
11. Step into the Market
via Little Glass Jar
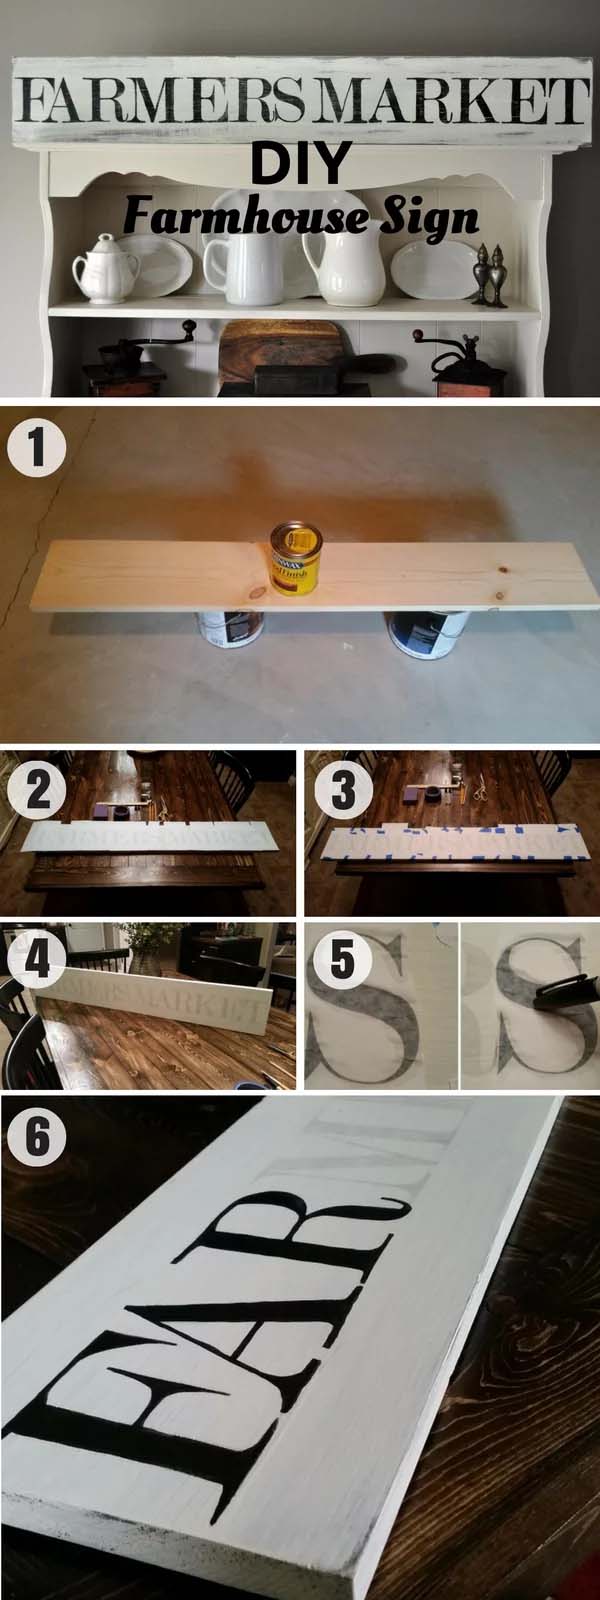
Consider this DIY farmhouse sign for a more subtle but no less genuine kitchen sign. Simply purchase a raw board, apply your favorite stain, then paint it white.
As you wait for the board to dry, print out the letters while they’re reversed and backward; this will ensure the ink is on the back of the paper when you place the letters on the sign. Tape the letters on the board and brush over each letter with a small paintbrush dipped in water.
Once done, use a Sharpie cap to scribble over the letters and transfer the ink from the paper onto the board before painting over the faded design using black craft paint. Finish the look using a fine-grit sandpaper block to give it a nice rustic appeal.
12. Step Back in Time
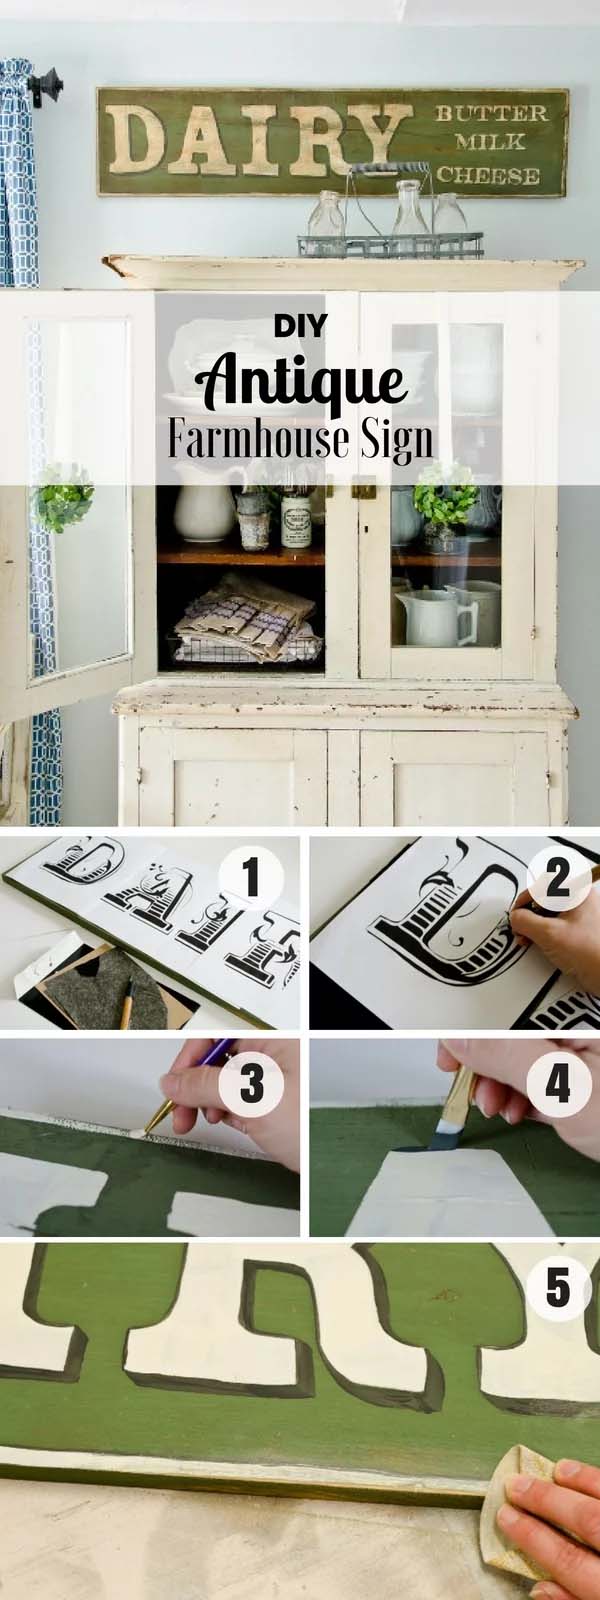
This dairy kitchen sign’s classic font, subtle, neutral tones, and faded edges lend a weathered feel that would complement farmhouse-inspired spaces perfectly.
Easily installed with a hook, this sign provides flexibility in choosing a display location.
13. Take a Bold Approach
via Sincerely Sara D
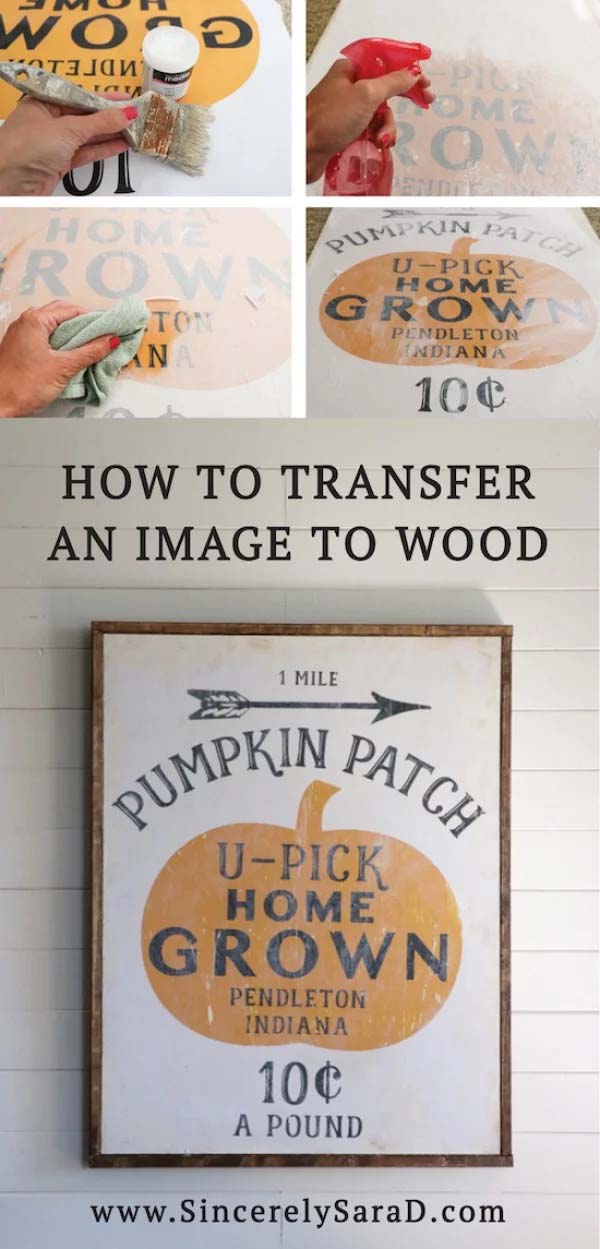
Lest anyone needs clarification about which season we are celebrating, this unique pumpkin patch kitchen sign, made from transferring a printed image onto wood, will have all your guests talking.
First, cut a piece of plywood to the size of your paper; ensure the image is reversed. Add a thin coat of acrylic media medium to your printed paper and board and allow it to dry. Then, add a thick coat of the medium to your board before gluing the paper onto it.
Let the design dry overnight, and then wet down the paper. Use a sponge to scrub away the paper and lightly sand for a distressed look. Finally, use a coat of varnish to help bring out the color.
14. Impress with a Galvanized Metal Sign
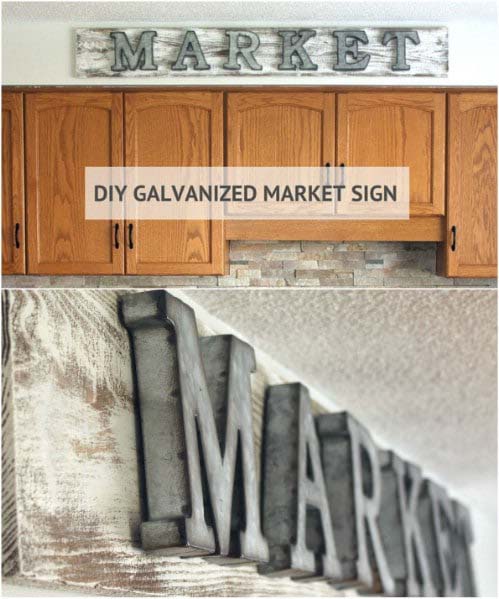
This weathered galvanized market sign is one of the classiest kitchen sign ideas and is very easy to make! You only need some paint, a piece of wood plank, and a paintbrush.
Using white paint and your paintbrush, employ the dry brush technique to create a weathered wood look. After it dries, sand it to give it more character, then hang your galvanized letters. Attach your hanging hardware and place the sign on top of your cabinets.
15. Build a Grocery Corner
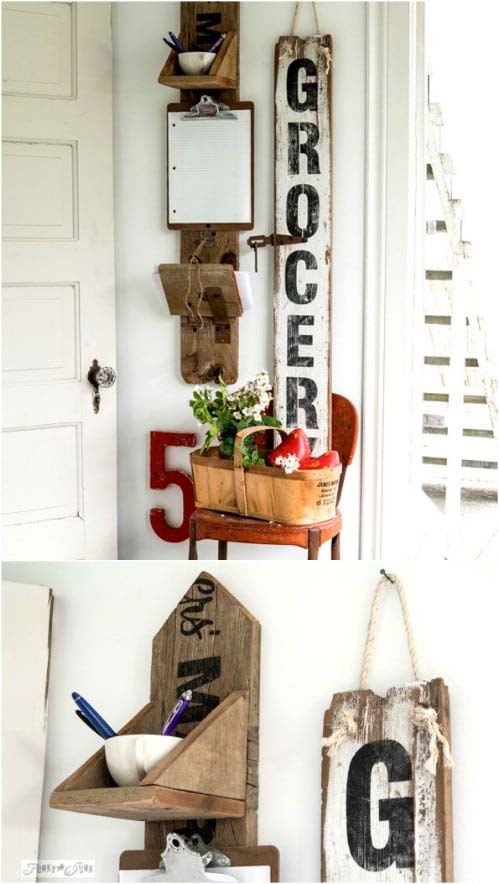
Vertical kitchen signs are an excellent fit for tricky wall spaces and are the perfect way to create quaint reclaimed wood message centers. A fence plank will do for this idea.
Lightly sand your plank, paint it with white paint in a sloppy manner, then lightly sand again after the white cures. Stencil “GROCERY” onto the plank, then use spade drill bits and heavy twine to hang your sign. The rusty old red chair adds some fun color and fits right into the vintage vibe!
16. Go for a French-Inspired Sign
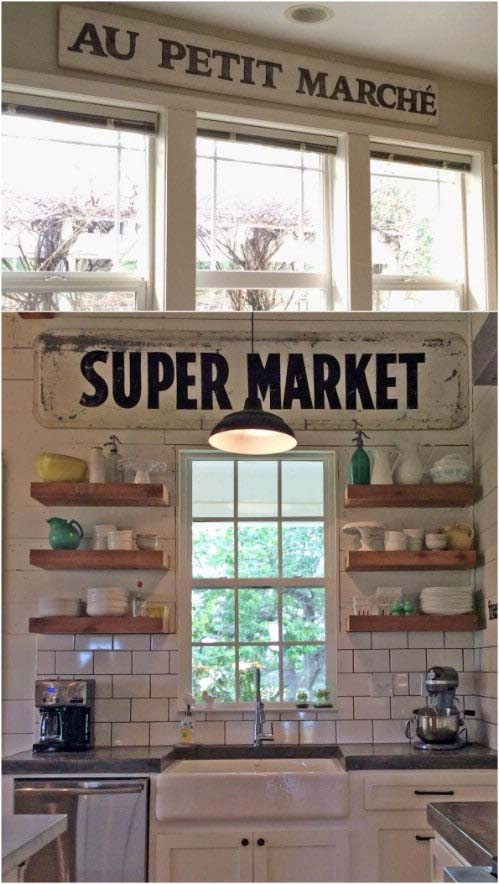
via Little Farmstead
An ideal plaque to display over your kitchen’s window, this weathered wooden sign proclaims a cute French message, “Au Petit Marche,” meaning “Little Market.” First, paint your board white, then age it with dark wax.
Print out the letters and trace them on your board using a pencil or Sharpie pen. Fill the letters with black chalkboard paint (or whichever you have) and then sand the letters to enhance the aged appearance further.
NB: The same procedure applies to the supermarket sign. The only difference is the font used for the wording, which is up to you to pick a font you like.
17. Express Gratitude
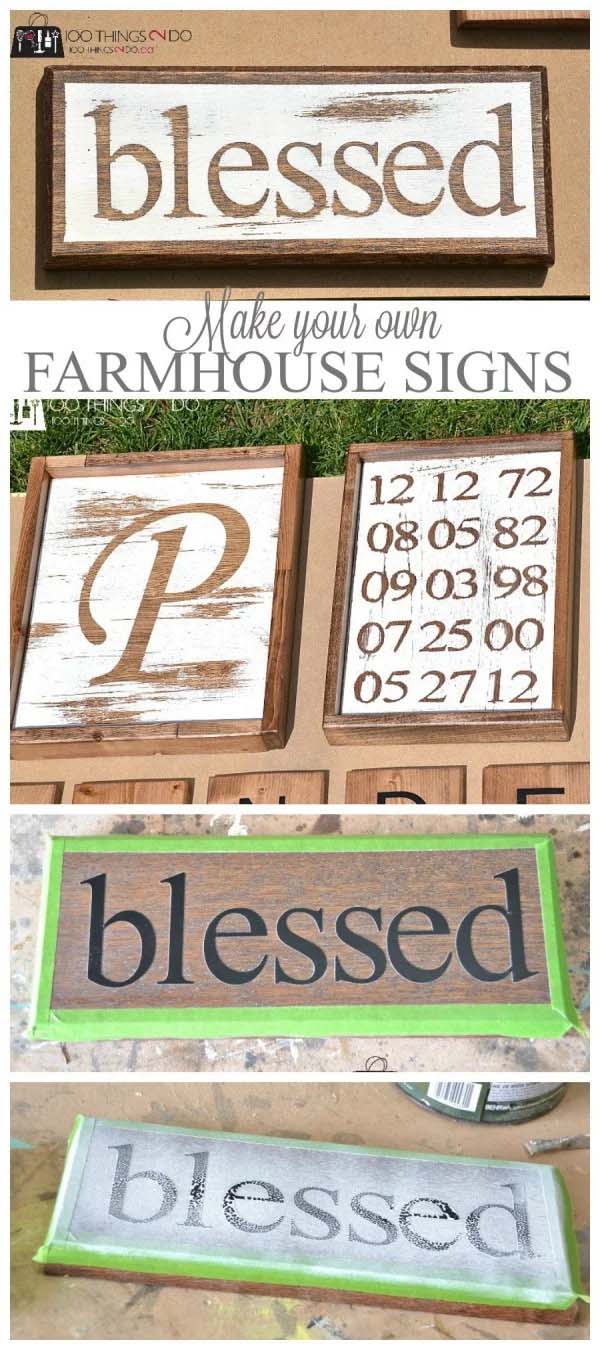
via 100 things 2 Do
This rustic wood-framed message serves as a good daily reminder of the things we have in life. Use a Silhouette to cut out your letters on adhesive vinyl for best results.
Using the dry brush technique, apply the first coat of white before applying additional coats as you prefer once that’s dry; covering at least ¼ in from the edges with painter’s tape will help create a small frame.
Peel off the letters using tweezers and begin “antiquing” your sign by exposing the underlying stain using grit sandpaper.
18. Bless Your Guests
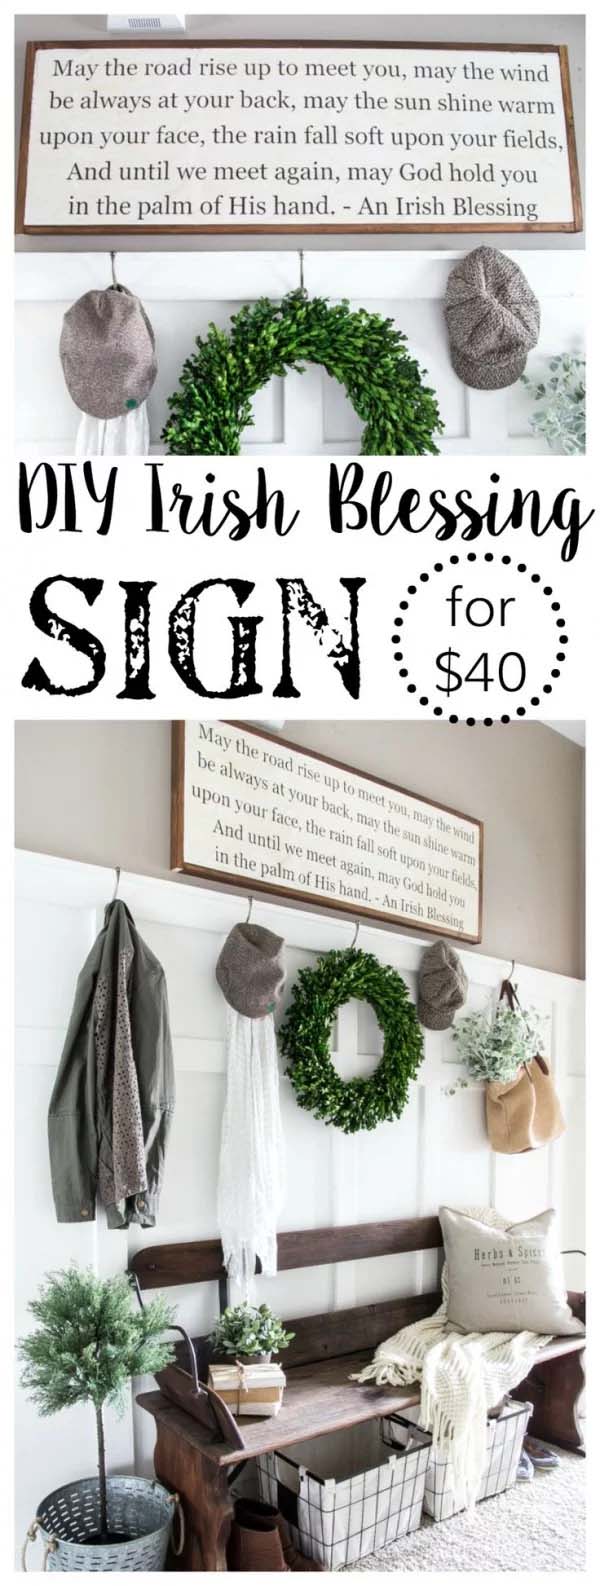
via Blesse’r House
There are numerous decorative kitchen signs that spread the message of blessing to those gathering underneath them, and this one carries a deep goodbye message that’ll enhance the warmth and hospitality around your kitchen.
19. Keep it Simple
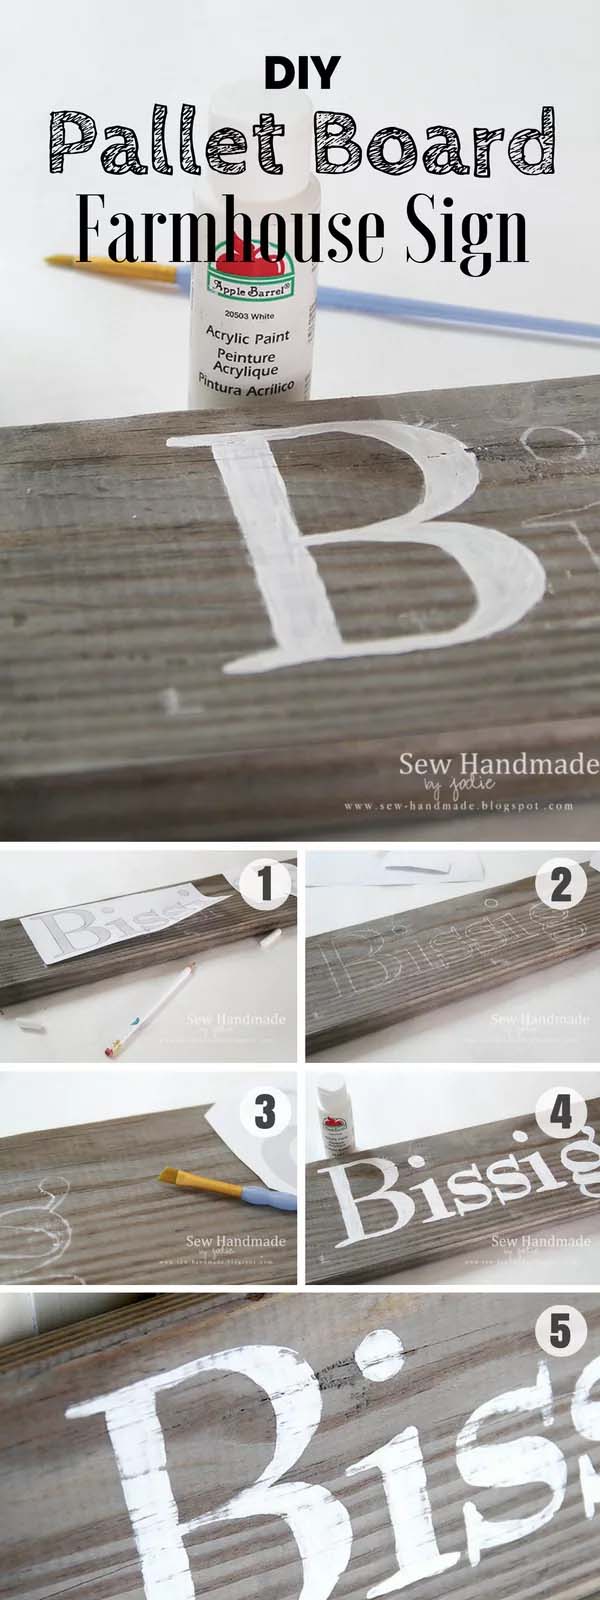
via Sew Handmade
Your kitchen sign ideas don’t have to be complicated for them to make an impact. This kitchen idea uses an old piece of pallet wood and printed letters.
First, use plain white chalk to color the paper’s backside and a sharp pencil to heavily trace the letters. Carefully paint the inside of your traced line with white acrylic paint, and finish off by sanding your letters lightly for that farmhouse look.
20. Distress Your Sign

Searching for a super easy idea to decorate your kitchen? Distress a painted sign to give it more depth and character, and display it on your kitchen walls. The above sign was made from a door bought from a second-hand store.
First, paint your sign with flat paint and let it dry thoroughly. Next, lightly sand the edges with a palm sander before using a sponge to rub a bit of dark wax on the sign. If you want your sign to be darker, add a thin layer and buff it off each time, and there you have it!
NB: This technique is very subtle, but you can make your sign look heavier with more wax and sanding.
21. Shine with Mason Jar Pallet Artwork
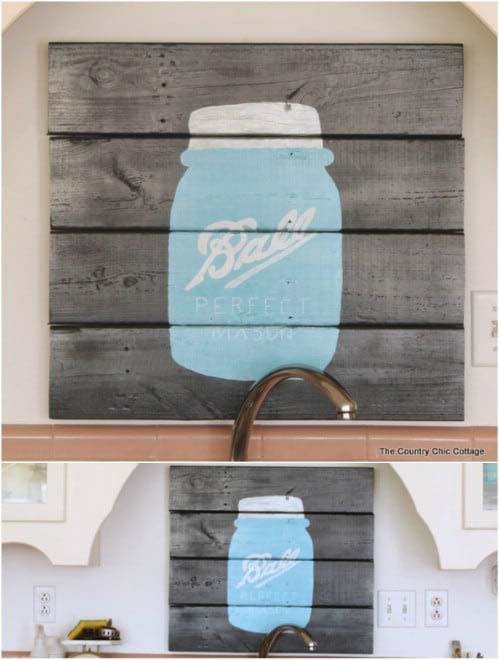
via Angie Holden
Mason jars and pallets make a simple yet versatile dynamic duo that’s sure to give your room a farmhouse vibe, not to mention they can easily be painted and personalized to your liking.
For this kitchen sign idea, you can freehand the mason jar or find something to stencil it from, e.g., a chalkboard shaped like it. Painting the jar an aqua shade and the lid a chalky white finish adds elegant flair to the design.
For the lettering, print an image on a regular-sized paper sheet; use a transfer paper under your image to trace it onto the board. Now, fill it in with a painter’s marker and finish it off with a sealer to make the sign easy to clean.
22. Display a Set of Boards
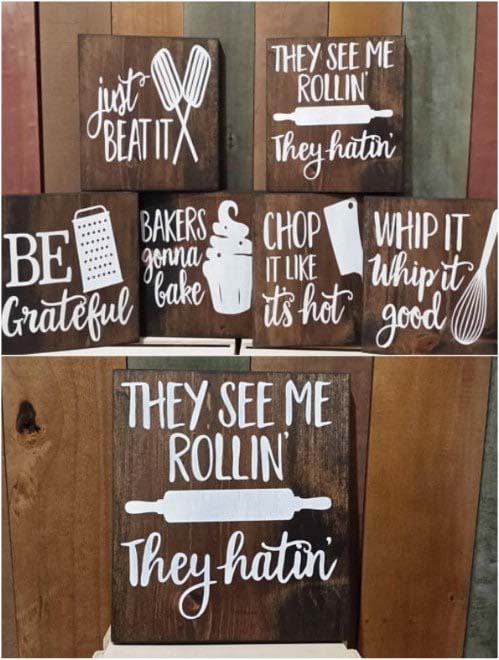
Whether you have a tall, long, or square wall area, options abound for displaying this excellent set of kitchen signs. The signs are worded in puns to old music titles, giving them a fun and whimsical touch that will have you singing throughout your cooking!
You can DIY your own signs with some reclaimed wood, white paint, and a bit of creativity, or purchase already-made ones at a local store—you can find similar ones on Etsy for as little as $10.
23. Cook at Any Time
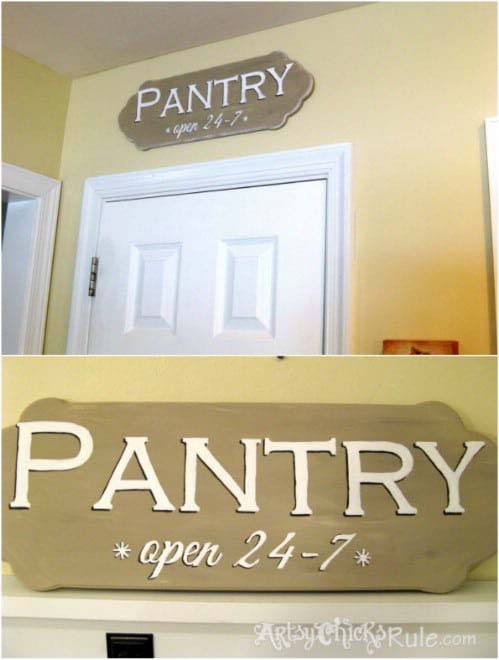
If you’re a seasoned DIYer, you know how much of a lifesaver the thrift store is. This kitchen sign idea is made from a thrift find, with the claim that the pantry is “Open 24-7,” making it wittier than other kitchen signs.
You only need to find a wood plank with a unique design, paint it your desired finish, and then transfer your favorite graphics onto the board using the methods we’ve discussed earlier. Simple, right? Well, what are you waiting for? Get thrifty and transform your kitchen into a fabulous space!
24. Make a Statement
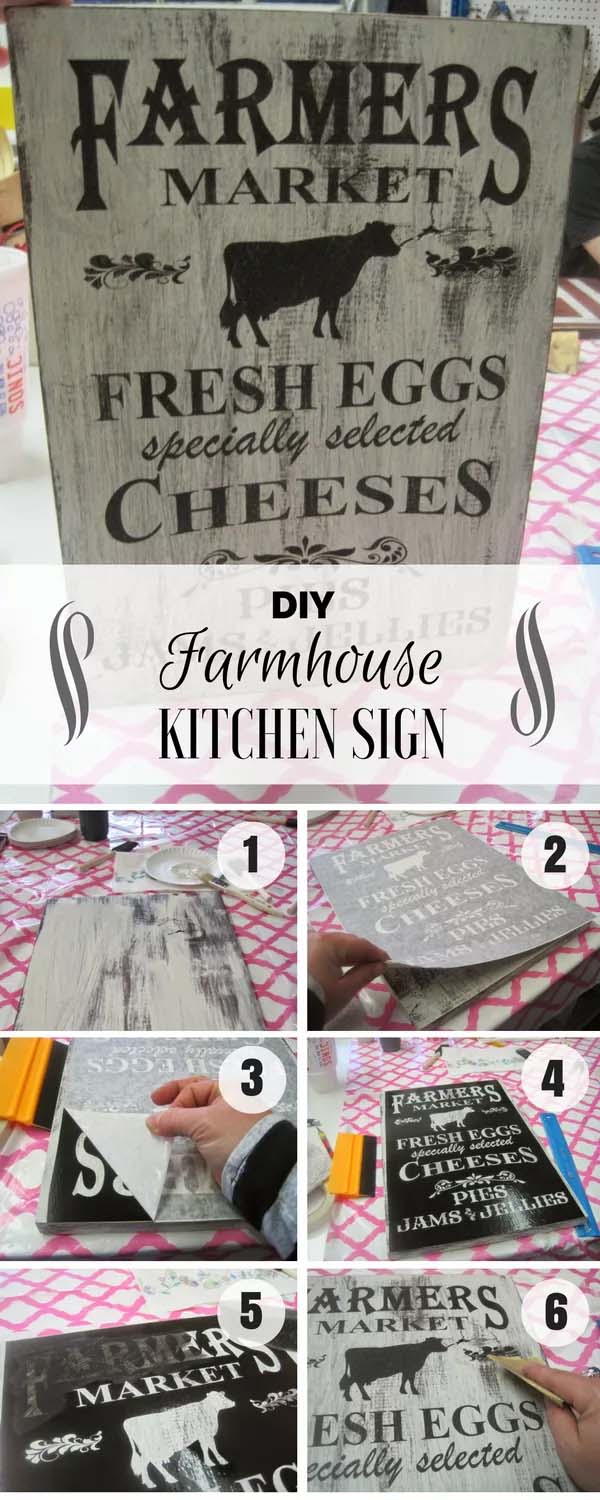
via Decorated Chaos
Embellish your kitchen with this rustic wooden sign with a stylish visual prompt of the essentials of a farmer’s market. You can get a vinyl cut of the design from a local vinyl shop and stencil it on your sign to make your work easier.
Paint your board with creamy white paint before attaching your vinyl “stencil,” and place the transfer paper down the middle so you have two sections; peeling off the paper in small-sized pieces while pulling at an angle will help prevent the vinyl from lifting.
Once the vinyl is attached to the board, use a foam brush to dab black paint on the wording. Wait for it to dry and start pulling off your vinyl to reveal the black painted/stenciled lettering—this is the fun part! In case there are hard-to-get pieces, use an exacto knife or tweezers to lift them.
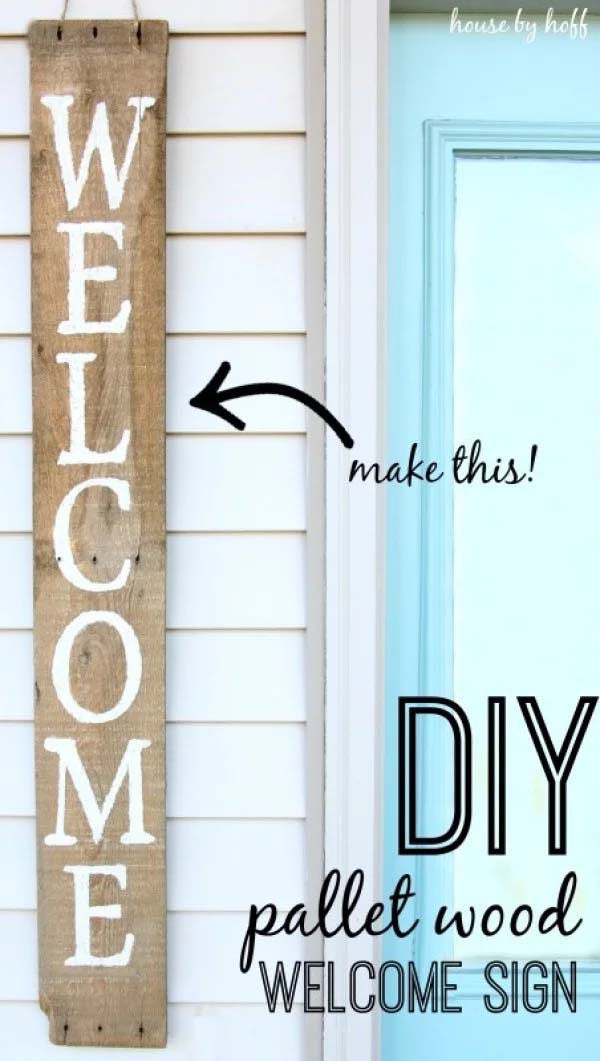
25. Bring it Outdoors
via House by Hoff
Not all kitchen sign ideas belong indoors; hang this vertical “WELCOME” sign outside your kitchen door to usher your guests into the space where the real magic happens.
Similar to other wood sign ideas, you only need to salvage a pallet wood plank and stencil the word “WELCOME” on it. That’s it! Oh, one other thing: place some flowers below your sign to make it even more hospitable and pleasant.


