Plaster of Paris is a simple to use hardening agent. Perhaps those of you who are familiar with popular projects such as ornamental decoration and paper-mache, have already heard of it.
Right now, there is an extremely popular crowd-pleasing trend that literally blows up Pinterest. It is about creating mesmerizing decorative flowers by using the plaster of Paris.
You just need to do is mixing the plaster, smoothly coating the floral pieces and leaving them to dry out. The result is notably dazzling.
Let’s have a look at 5 projects you will fall in love with and can try at home.
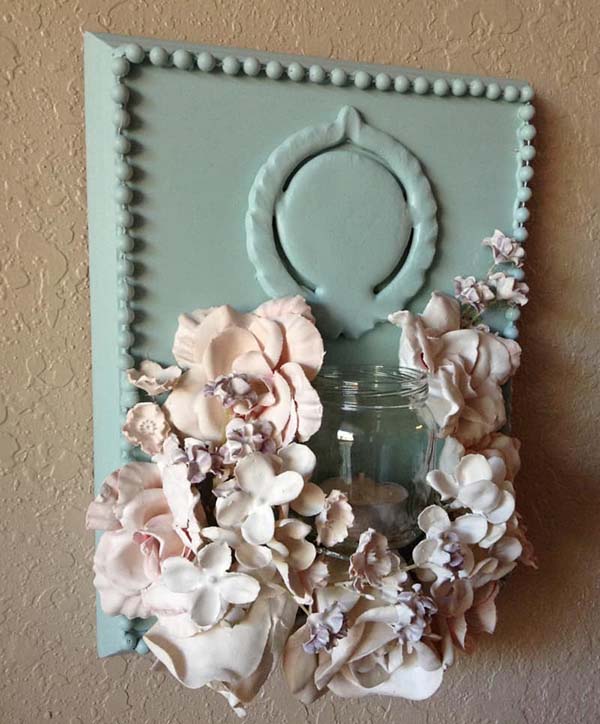
1. Plaster of Paris Flowers Votives
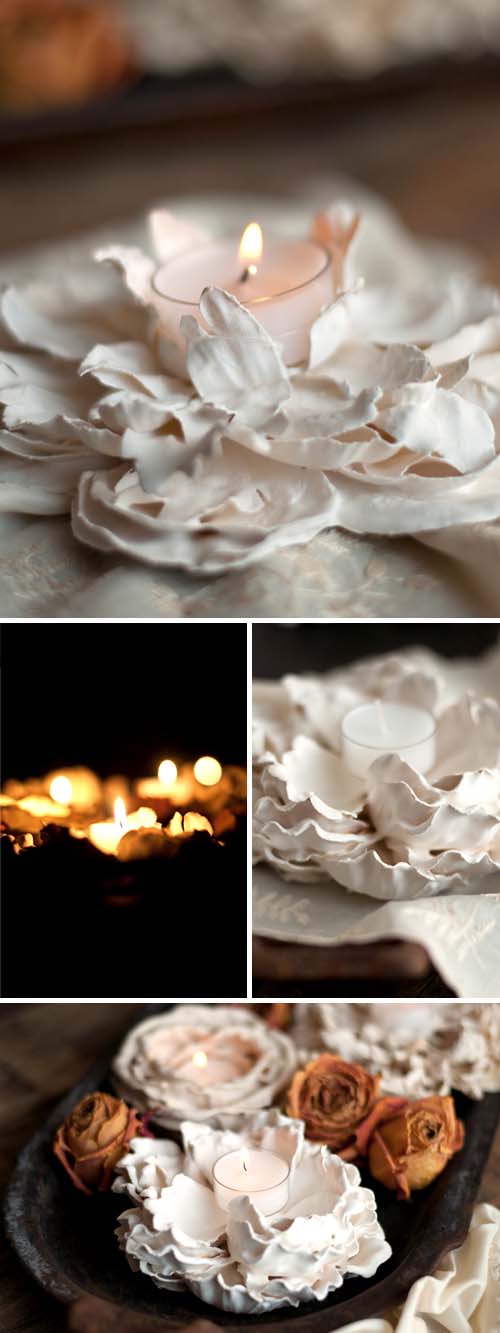
All you need for this project is a solid dose of creativity, some free time, and willingness to get your hands messy.
I just love how delicate and pretty those plaster-dipped flower votives are. They would fit any room in the house and create a low-key and idyllic feel wherever they are being displayed.
The key materials you will need for this high-level DIY project are a bunch of faux flowers, plaster, water, an old bucket to mix, votive (for sizing), tiny rubber bands, and a bit of a hot glue.
DIY project details: designmom.com
2. Pretty Handmade Dipped Flowers
Imagine or not, this type of sculptural delicate floral pieces could also be made from real flowers simply dipped in plaster.
And when speaking of dipping, you can dip basically anything from fake flowers (obviously) to smaller branches, pinecones, and leaves.
Hint: Keep in mind that your dipped flowers need to hang until they dry up. Otherwise, they will stay flat on one side.
DIY Project Details: designrulz.com
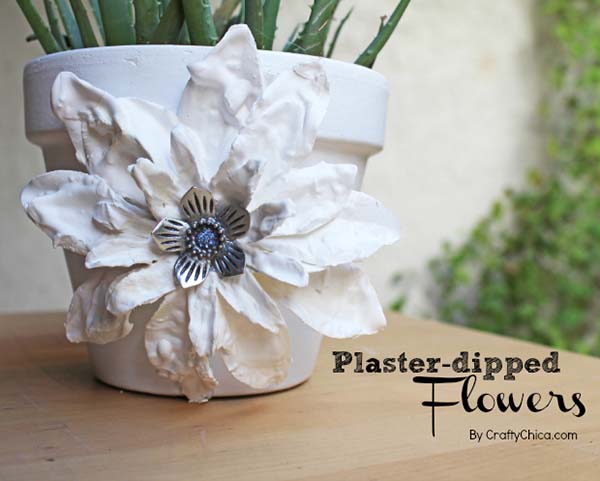
3. Hand-painted Plaster Flowers
Once the plaster flowers dry out, you can create something unique by only using your imagination…and a bunch of acrylic paints.
No matter if you leave the floral elements blank or save the painting for later to decorate them as you like, they look beautiful in both all white and with colors. Or, you can go a bit artsy and paint just a few of the flowers and leave the rest plain, why not?

- Plaster dries up very quickly so make sure you’ve prepared everything in advance.
- Use some wax paper to work on.
- The cheapest faux flowers you can buy are in the One dollar store. Don’t spend too much!
- Do not be afraid of failing, try to have fun during the entire project.
DIY Project Details: craftychica.com
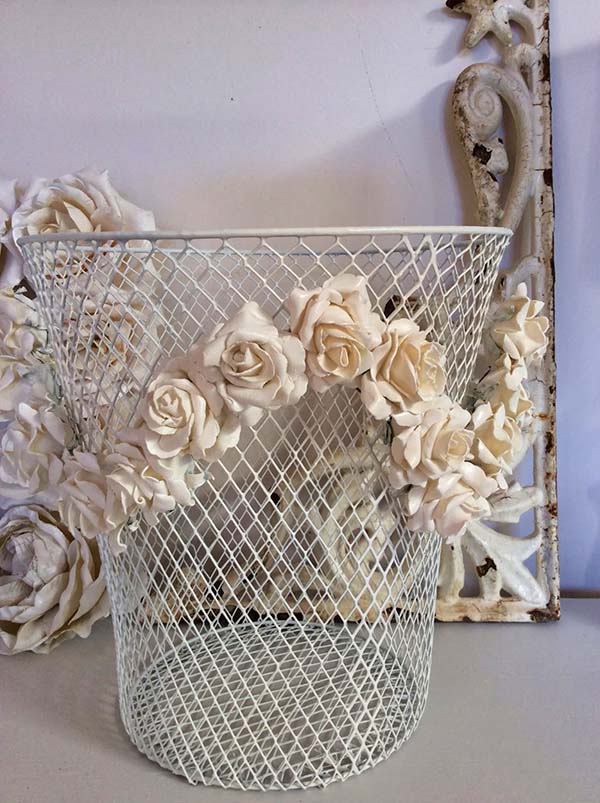
4. Beautiful Vintage themed Plaster Roses
These impressive flowers feel hard, detailed and look sculptured without a doubt. They are just amazing and have endless applications such as displayed on mirror frames, on vintage-themed furniture, entangled baskets, and trinket boxes.
If you paint these vintage plaster flowers in golden or silver, they would be the ideal decoration for every indoor wedding ceremony.
Or you can build frames for the after-wedding photos. In this case, the plaster floral elements (why not roses?! 
DIY Project Details: thebluebirdsarenesting.blogspot.com
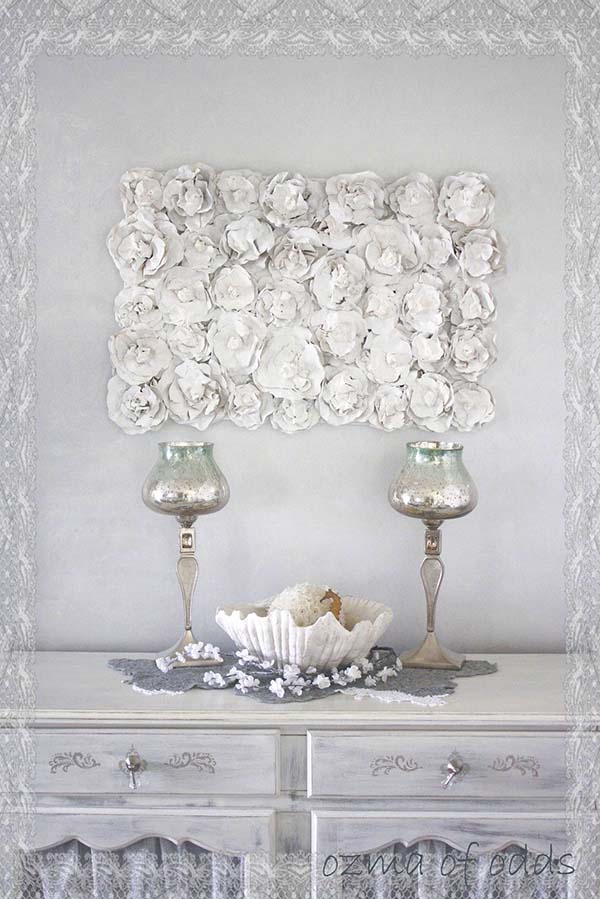
5. Delicate Plaster Roses Wall Art
Once you have several plaster roses prepared, you can try to arrange them on a simple canvas board. You can use some delicate spray paint to give them a more sophisticated look.
Make sure the whole canvas board is covered. Then, use some simple hot glue to stick them together.
In the end, you can try covering them in plaster of Paris. By the time you are finished covering them in the plaster, it will be good to start over, painting on the gesso paint until all flowers are ideally covered. Leave them to dry out overnight. And voila!
DIY Project Details: ozmaofodds.blogspot.com
As you saw, these 5 intriguing DIY projects take common faux flowers and turn them into delicate pieces of art – using the cheap art medium, called plaster of Paris.
It is a truly magical mix that comes in powder form, easily changes into a liquid and quickly dries to a hard porcelain-like finish within minutes.
The beauty is simply that each of these plaster flowers is 100% unique.

