If you’re trying to create some rustic charm, it’s time to get acquainted with burlap. It’s the secret sauce for decorating on a budget. Here are some rustic DIY burlap decoration ideas to inspire you.
A couple of quick tips when working with burlap. It can sometimes give off an unpleasant odor.
You can take care of this by running it through the wash once using laundry detergent and some baking soda. Lay it flat to dry.
This also softens the fabric, making it easier to work with.
1. Make a Beautiful Beach and Country DIY Burlap Tote

By using a thick piece of burlap, the tote holds its shape. It doesn’t need another form.
Serge or sew the corners and turn the bag inside out, turning the exposed seams inward. Hem the top and secure the handles with leather rivets.
via Hand Madiya
2. Spruce Up Your Kitchen with a Burlap Utensil Holder
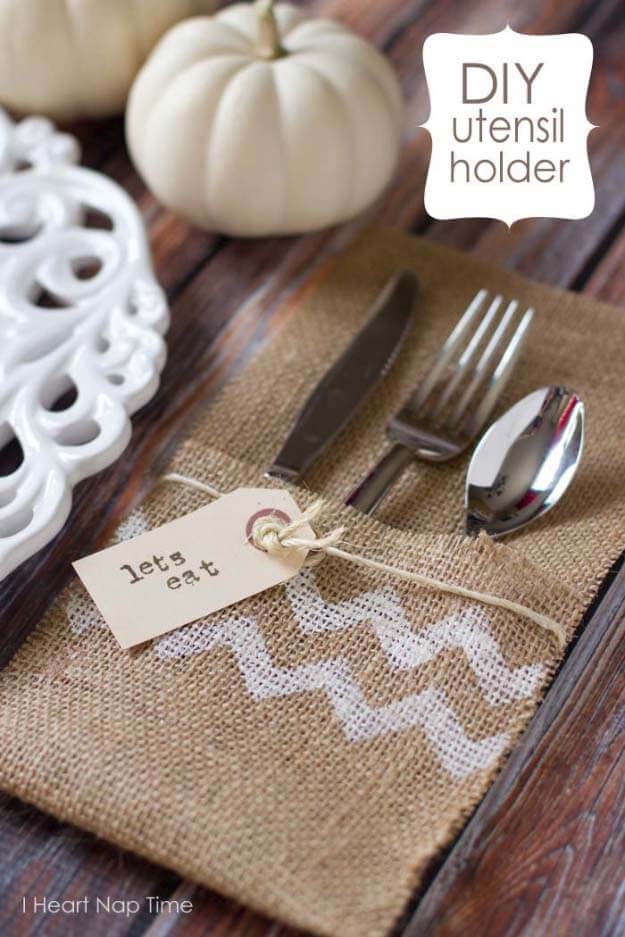
Make these quick and easy utensil holders with burlap, a stencil, and paint. The tag and twine are optional and can be used as place cards.
The twine is lightly glued onto the back. If you don’t have tags, use cardstock. Paint the edges with coffee for a watercolor effect.
via I Heart Nap Time
3. Elevate Holiday Ornaments with Burlap Wrapping
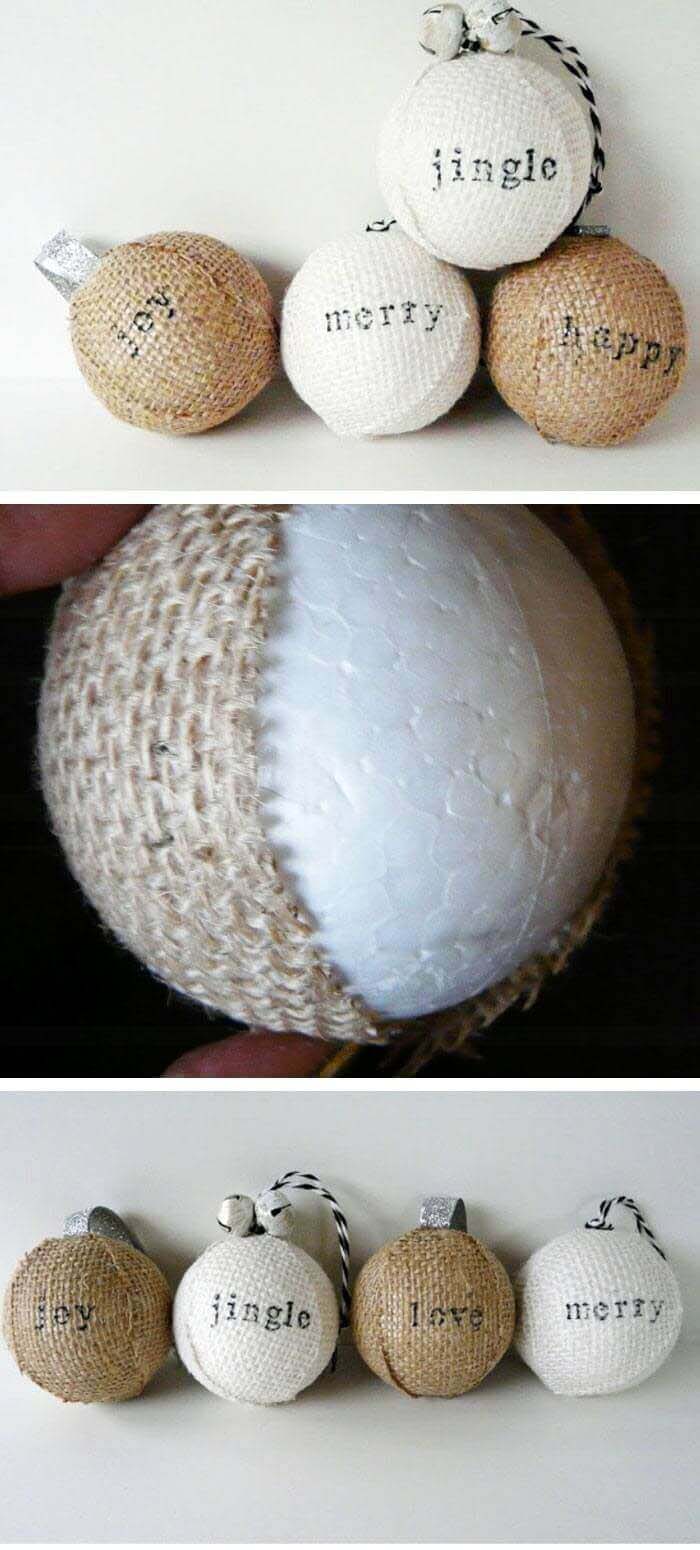
Glue leaves of burlap onto foam balls. Hand stamp them using permanent ink.
Glue hooks into the tops and hang them up using ribbons and colorful strings.
via Bliss Bloom Blog
4. Create an Eerie Atmosphere with Burlap Wrapped Votive

Contrasting shades of burlap are the basis for this delicate votive candle decoration.
Use LED candles. Real candles may heat the glass enough to melt the glue that holds all your pieces in place.
via Love This Pic
5. Enhance Your Table with a Monogrammed Burlap Runner
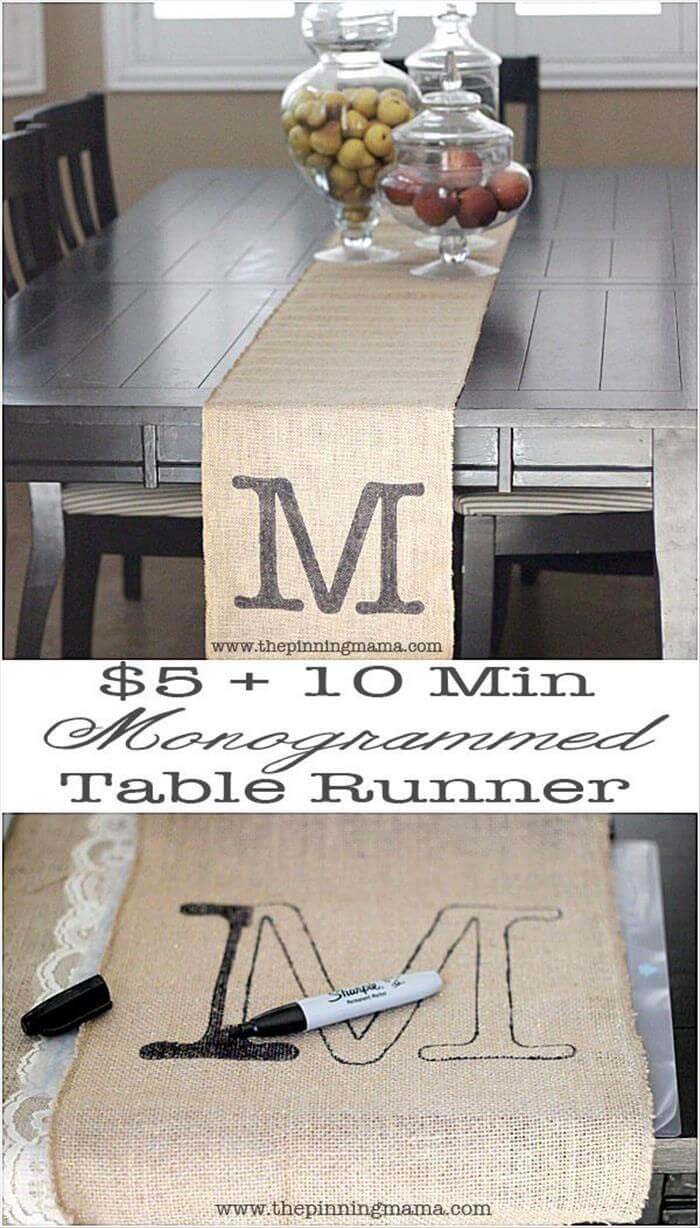
A single letter creates a personalized monogram on this store-bought burlap table runner.
Fill in the letter with a black magic marker. You can always dress up this table runner by gluing a lace ribbon on each side.
via The Pinning Mama
6. Revitalize an Old Ottoman with Burlap Cover
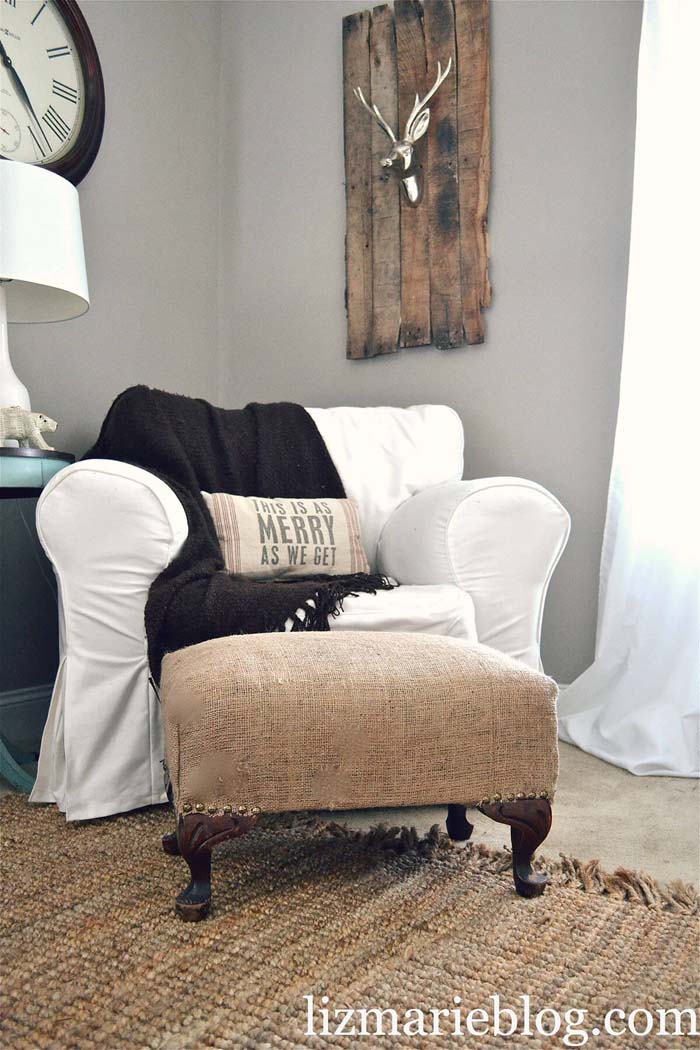
An old ottoman gets a new life when it’s recovered with burlap. Fold in the edges, staple to the frame and finish with some furniture tacks.
Experiment with paint and patterns. If you don’t like it, burlap is inexpensive enough to try something else.
via Liz Marie Blog
7. Light Up Your Home with a Flounced Burlap Lampshade
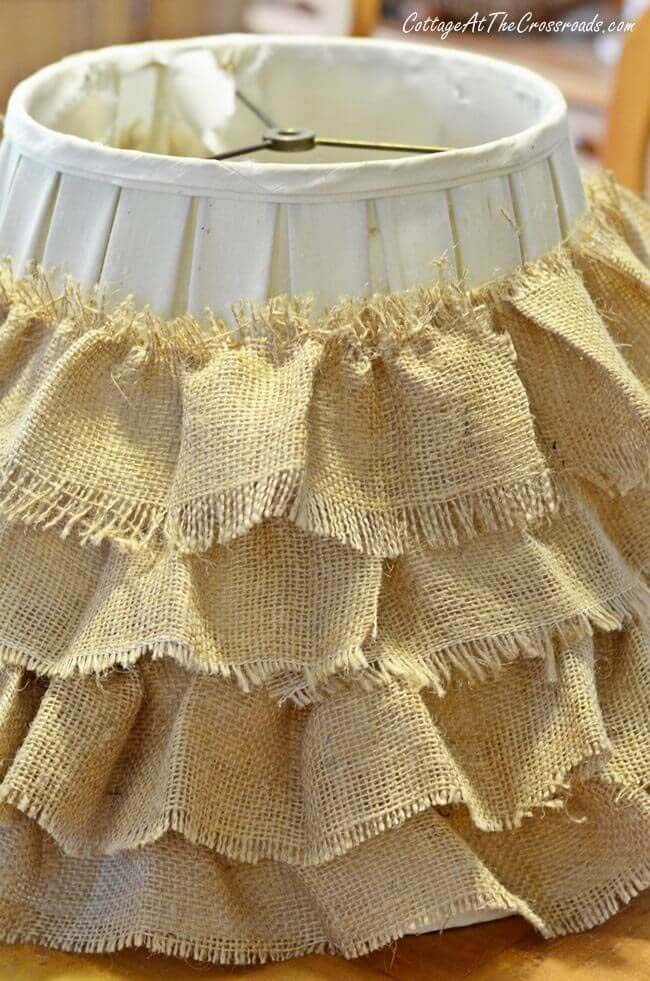
Long lengths of burlap are hot glued to an old lamp shade. A running stitch will easily gather burlap to form a ruffle.
It takes a little patience to get it even all the way around. Pull out strings on the ends to create some fringe.
8. Get Creative with a DIY Potato Sack Chalkboard
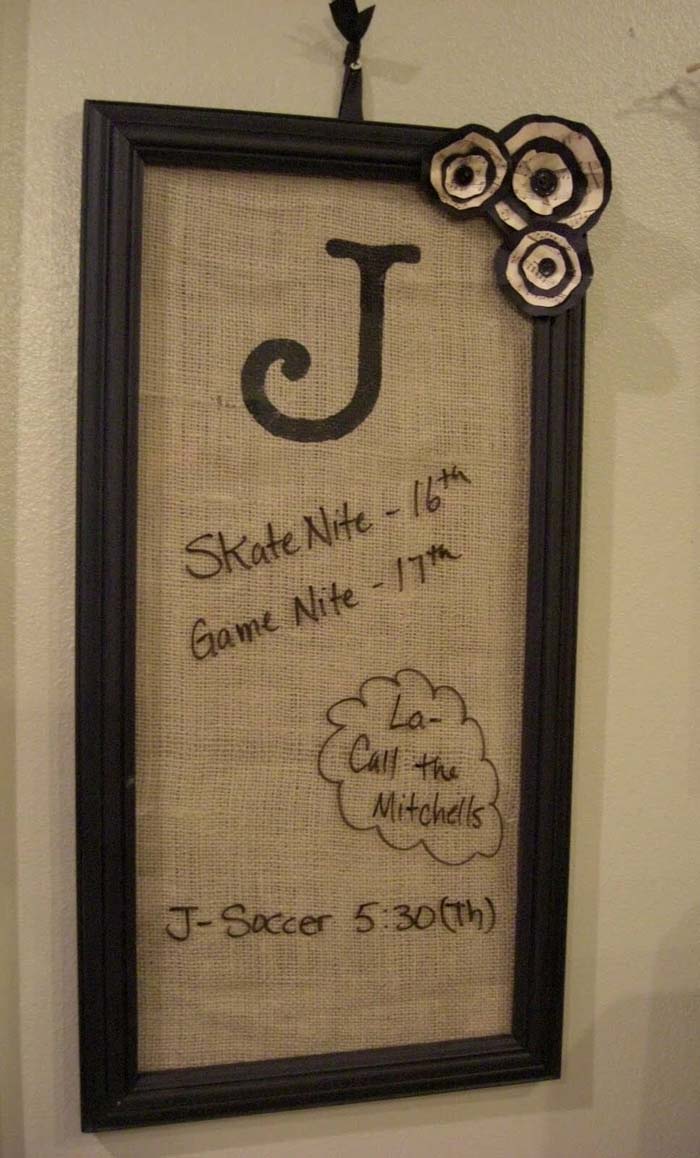
Paint a picture frame black with chalkboard paint. Stencil the monogram onto the burlap and glue to the backing of the frame.
Place the frame’s glass back on top. Paper flowers were added to add interest in the top corner. Write memos on the glass with dry erase markers.
9. Be Organized with a DIY Burlap Pin Board
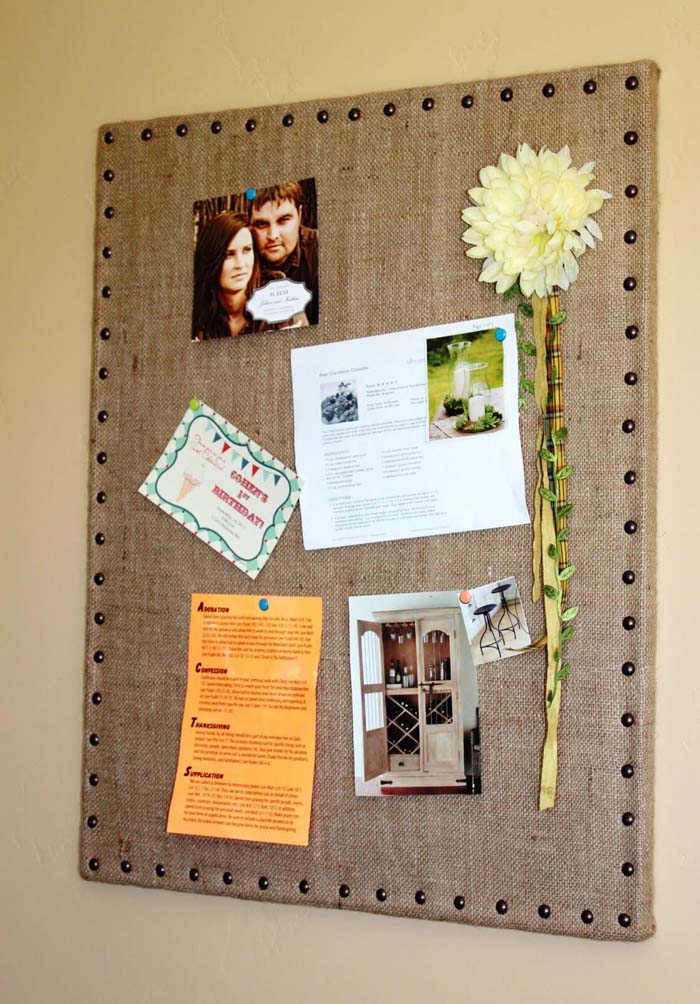
Fix burlap onto cork board using tacky spray glue. Use decorative hammered furniture tacks along the edge for visual interest.
Attach the corkboard to another piece of wood for strength and to be able to add a hook onto the back for hanging.
10. Upgrade Your Vase Planters with Burlap Wrapping
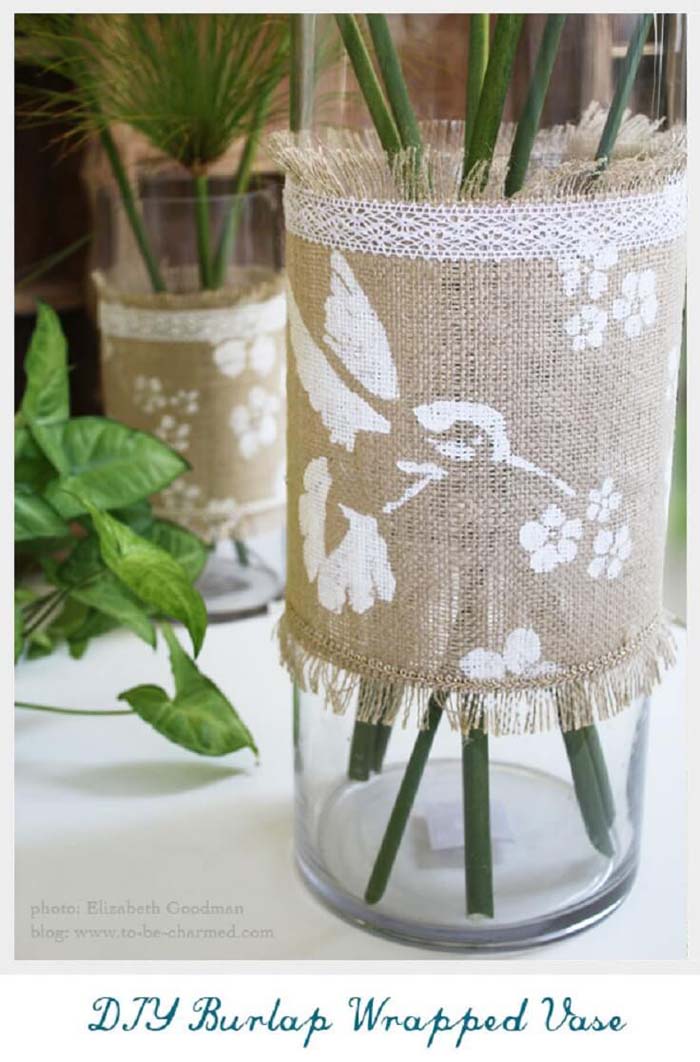
The embellishments and fringe are key to making this look more like art than school craft.
Pick stencils that work with your space. They can be patterns instead of motifs.
Don’t be afraid to experiment with different colors of burlap. Go with reds and greens at Christmas.
via To Be Charmed
11. Bring Rustic Elegance to Your Home with Burlap Roses
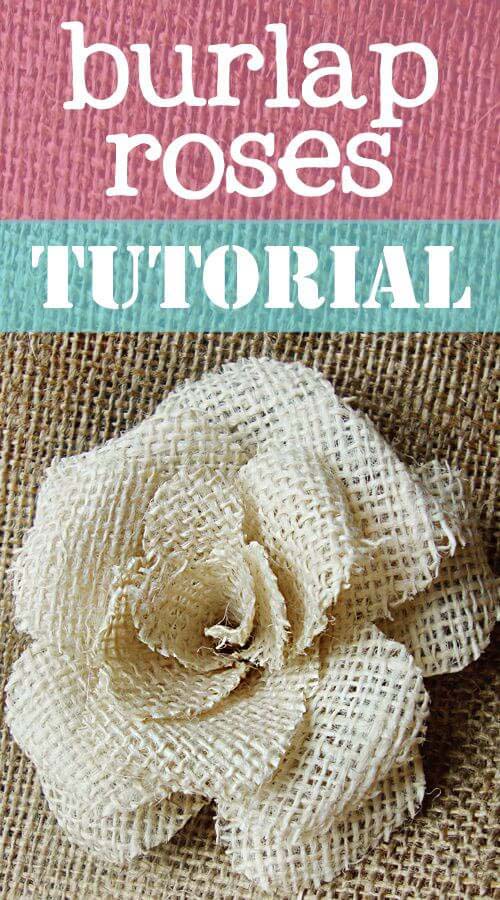
There are many tutorials around for making burlap roses. They’re an eye-catching element in any type of arrangement.
Coat the burlap with Mod Podge to make it easier to work with. Choosing different colors of burlap opens up possibilities for every holiday and event.
via The Mama’s Girls
12. Embellish Your Home with a Customized Burlap Banner
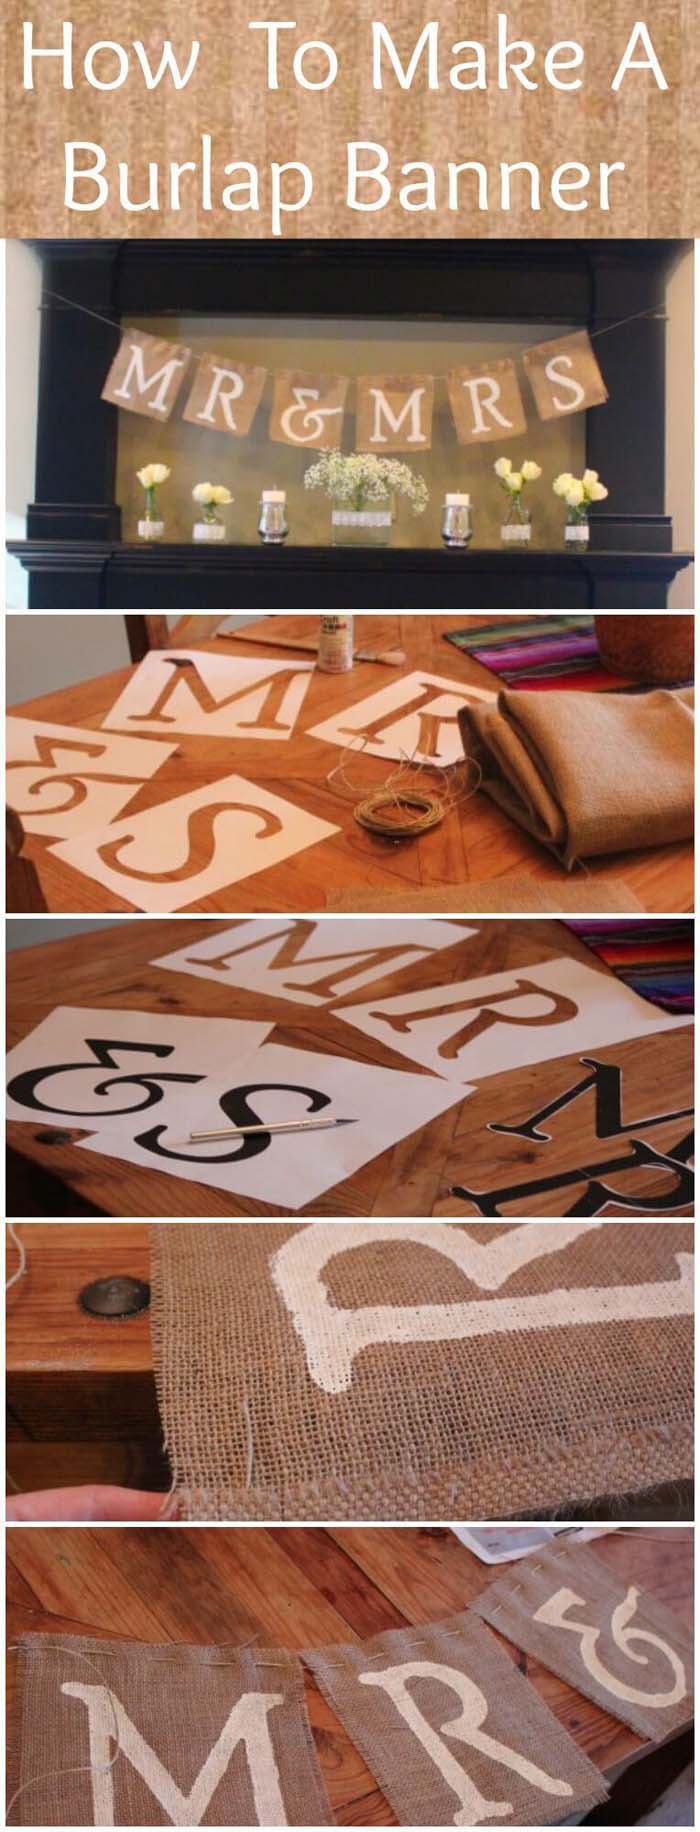
A yard of burlap is all it took to create this wedding dinner banner. Iron out the burlap as much as possible.
Use a running stitch of twine to link the letters together. Doing this saves time and materials.
13. Make an Artistic Statement with Burlap Canvas Wall Art
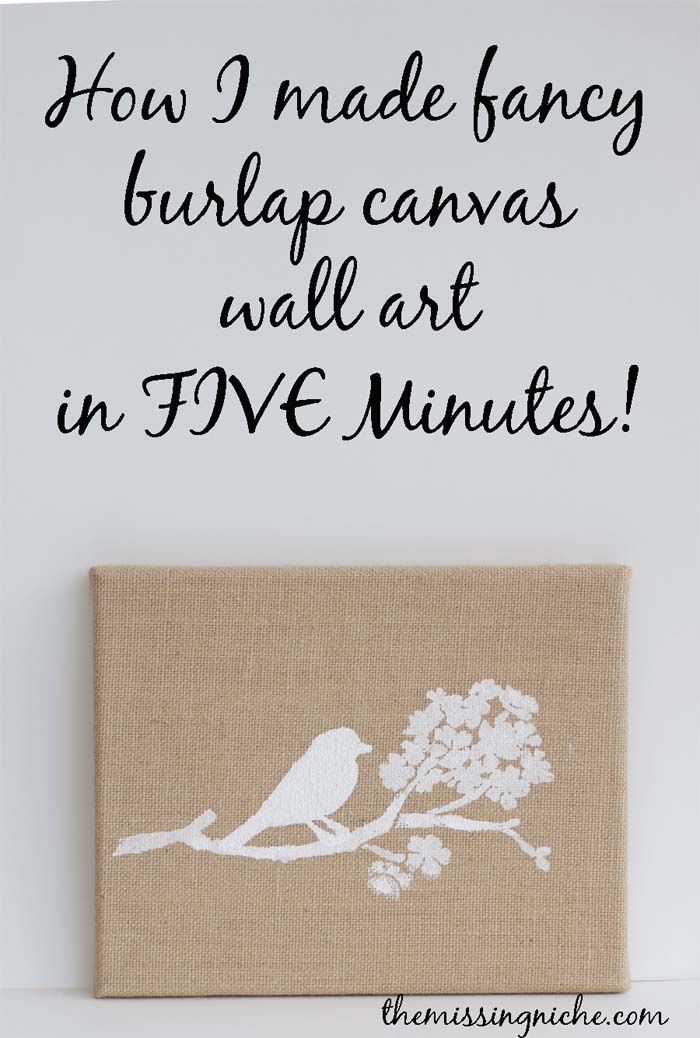
This is an inexpensive way to introduce burlap into your home décor. The burlap canvas and stencil are store-bought, saving you time and frustration.
Build up the paint using light layers. Allow each layer to dry before repositioning the stencil.
14. Transform Halloween Plastic Bucket with Burlap Cover
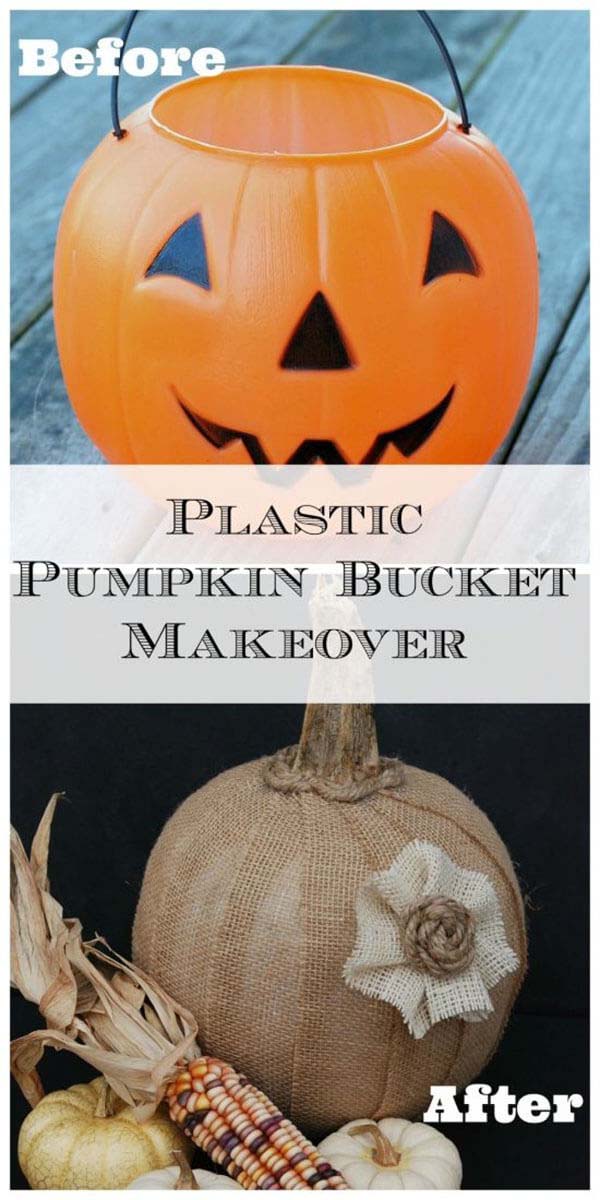
This is even easier to make than you think. Stuff a plastic Halloween pumpkin with enough plastic bags to create a dome. Secure the top with duct tape.
Glue a real or fake stem on top. After painting, glue strips of burlap around the pumpkin. Hide the edge of the stem with jute twine. Finish with a burlap flower.
15. Adorn Monogrammed Art with Burlap Canvas Backdrop
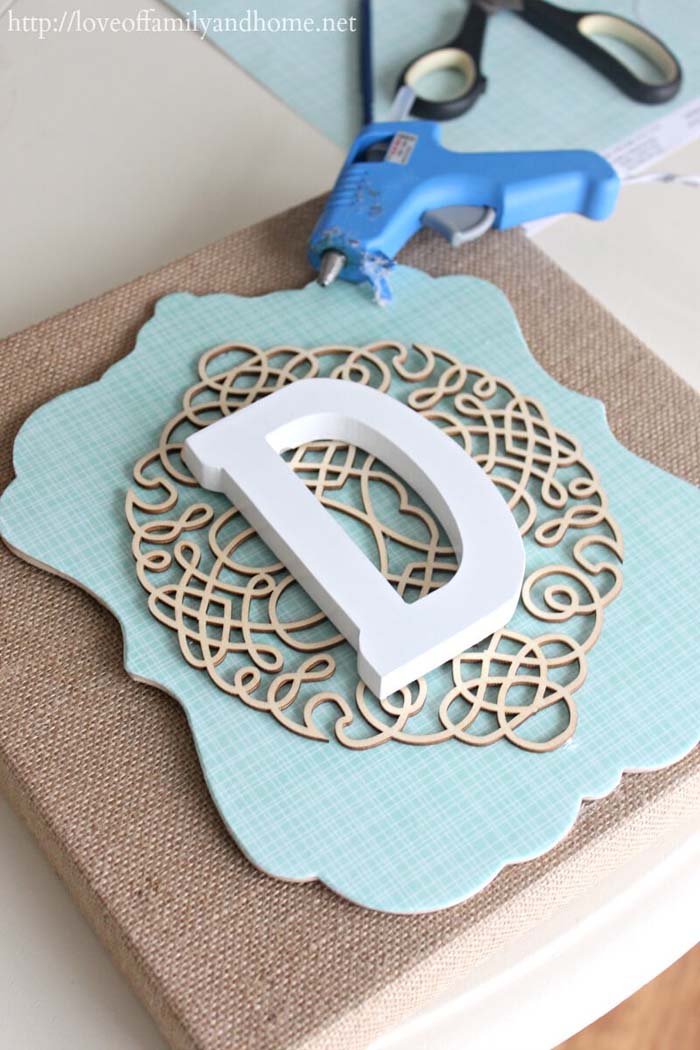
Create a personalized three-dimensional piece with items found at your craft store.
Wood plaque, scrapbook paper, laser cut scrollwork, and a family monogram are stacked on top of a burlap stretched over canvas.
16. Celebrate Fall with a Hand-Stitched Porch Bench Pillow
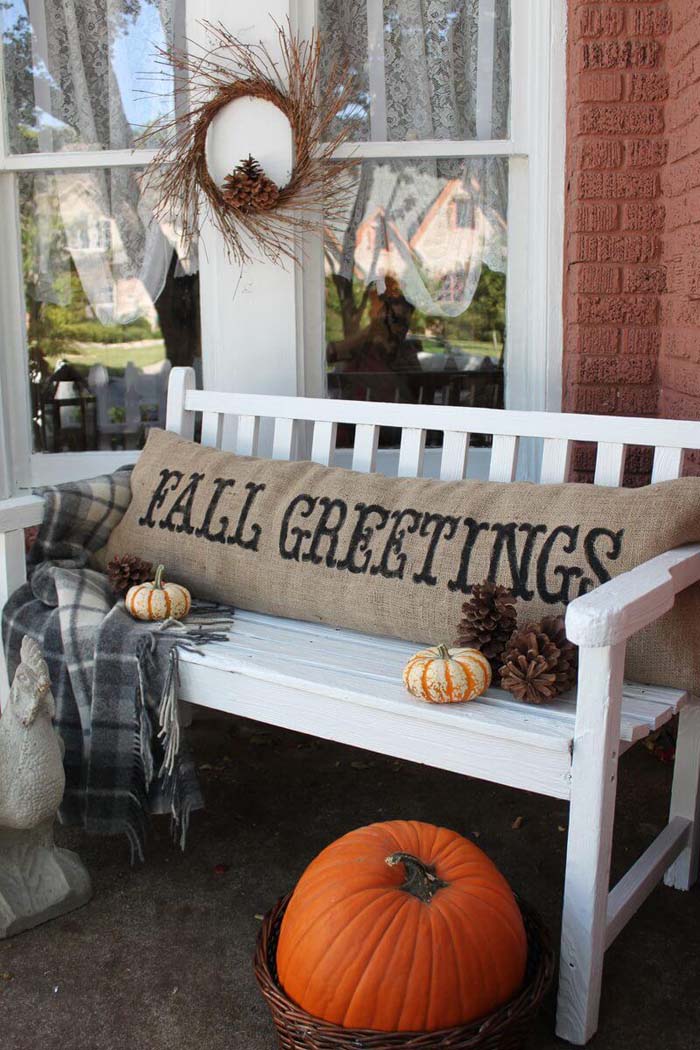
Create the intricate lettering using an electronic cutting machine. To avoid paint bleed, hand paint the edges first.
After letting the edges dry, fill in the rest using a dabbing technique.
via Opulent Cottage
17. Decorate Your Mantel with a Rustic Burlap Banner
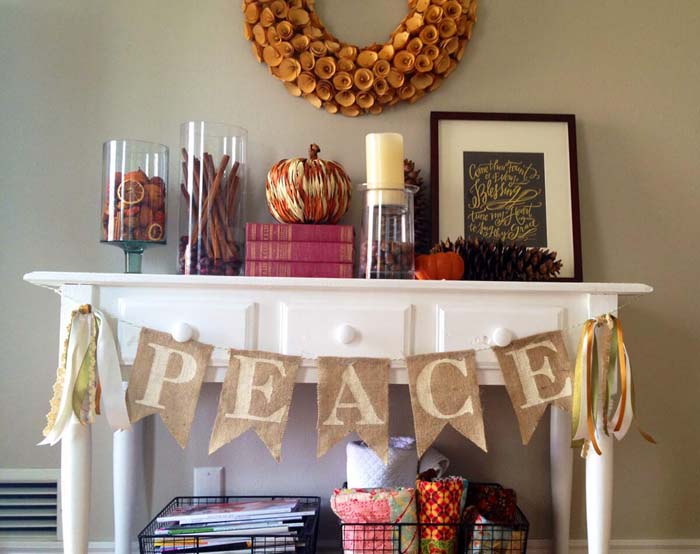
This is an easy stencil project. Glue the burlap pennants to a length of jute.
Add colorful ribbons on the ends for a polished look. Use this idea for birthdays and anniversaries, too.
via Marta Writes
18. Bring Farmhouse Charm to a Home with Burlap Wreath

You can put together this amazing-looking wreath in a few minutes.
You’ll need about 25 feet of burlap ribbon to cover a 12-inch metal wreath frame. To conceal the raw edges of the ribbon, fold it inward.
via Burlap Wreath
19. Personalize Your Home with a Stenciled Burlap Sack
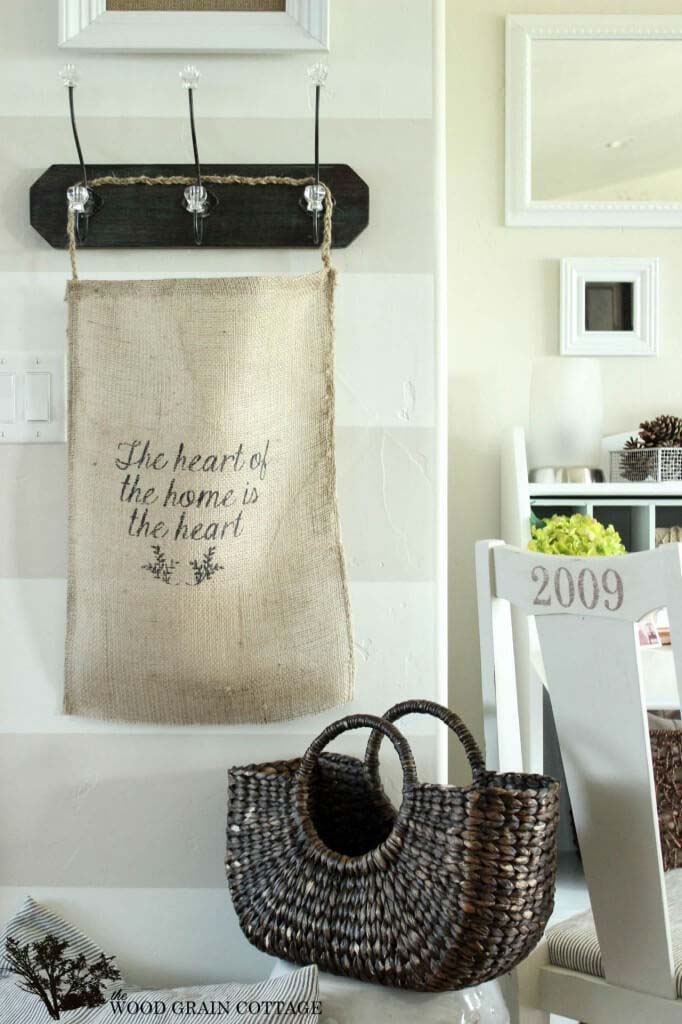
This bag was stenciled using a Silhouette electronic cutting machine.
When stenciling a cursive font, use a traditional dabbing technique. The over-spray and paint bleed when using brushes and sprays is noticeable.
20. Jazz Up Your Decor with Stenciled Burlap Pillow Sleeve
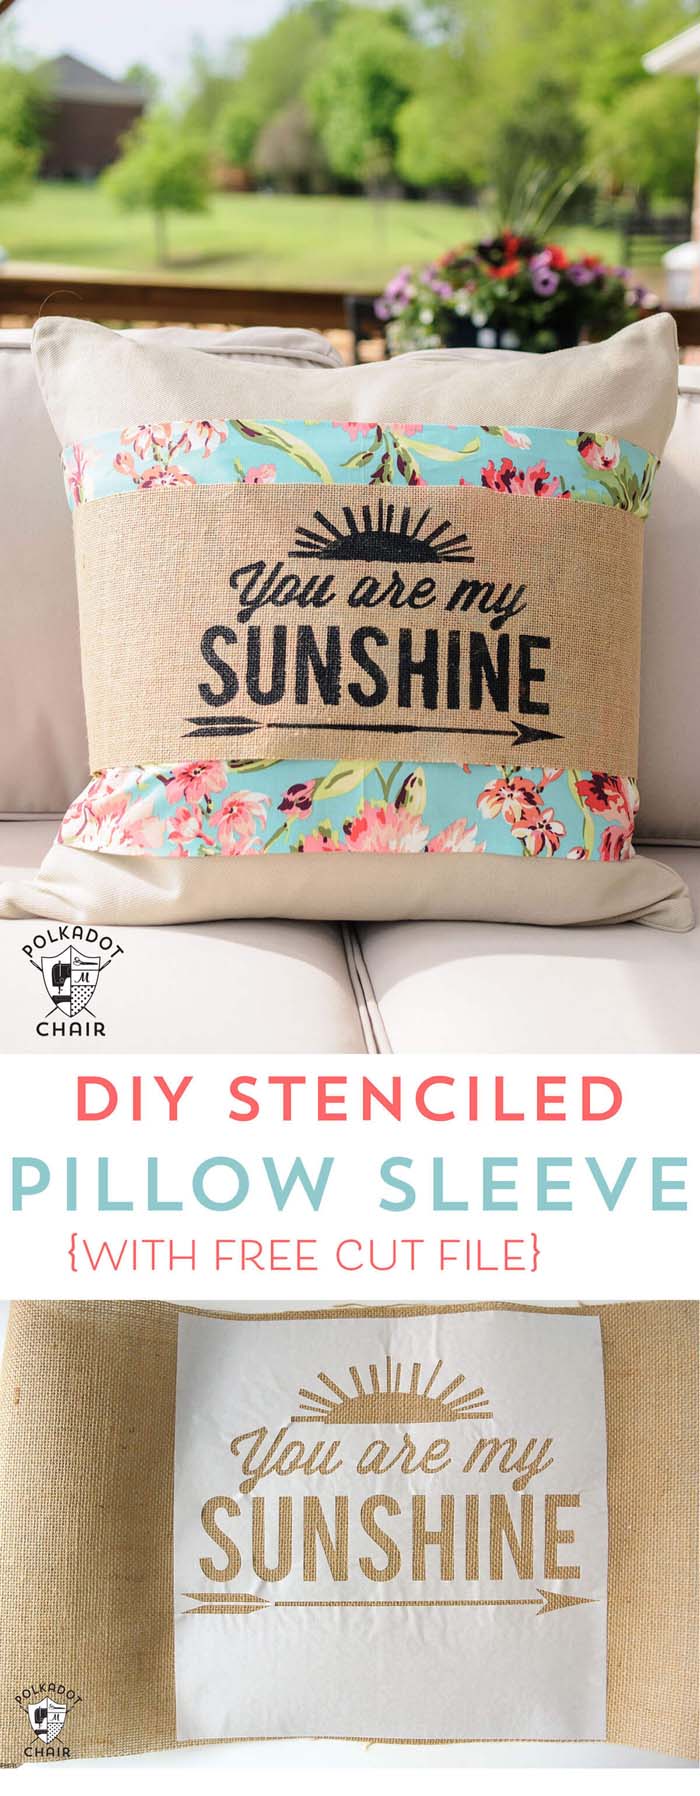
Pillow sleeves are the answer to experimenting with patterns and color. They use less fabric and can be changed out quickly.
Using pillow sleeves also means your closets won’t be stuffed with throw pillows that only get used once a year. Cut the stencil on freezer paper using a Cricut.
It’s applied to the burlap, which is then sewn onto another piece of fabric. Tie sleeves around the back of a plain throw pillow using ribbon.
via Polkadot Chair
21. Add Texture to a Key Holder with Customized Burlap Art
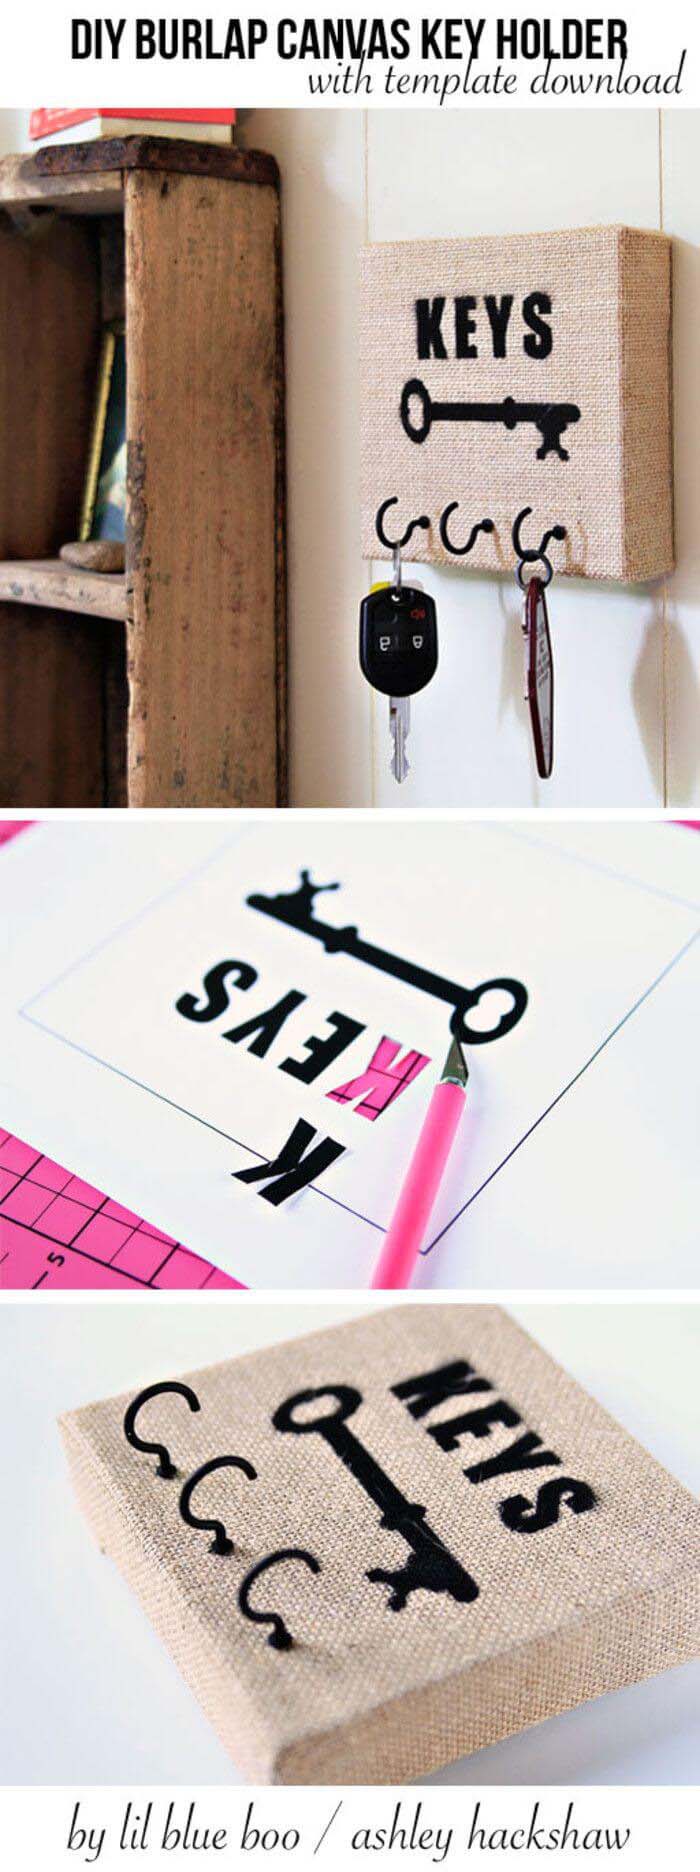
The box is a canvas frame with burlap stretched over it. Create the stencil by tracing an image found on the internet onto a label and cutting it out.
All that’s left to do is screw in hooks onto the edge of the frame by hand.
via BlogLovin
22. Create a Rustic Stenciled DIY Burlap Table Runner
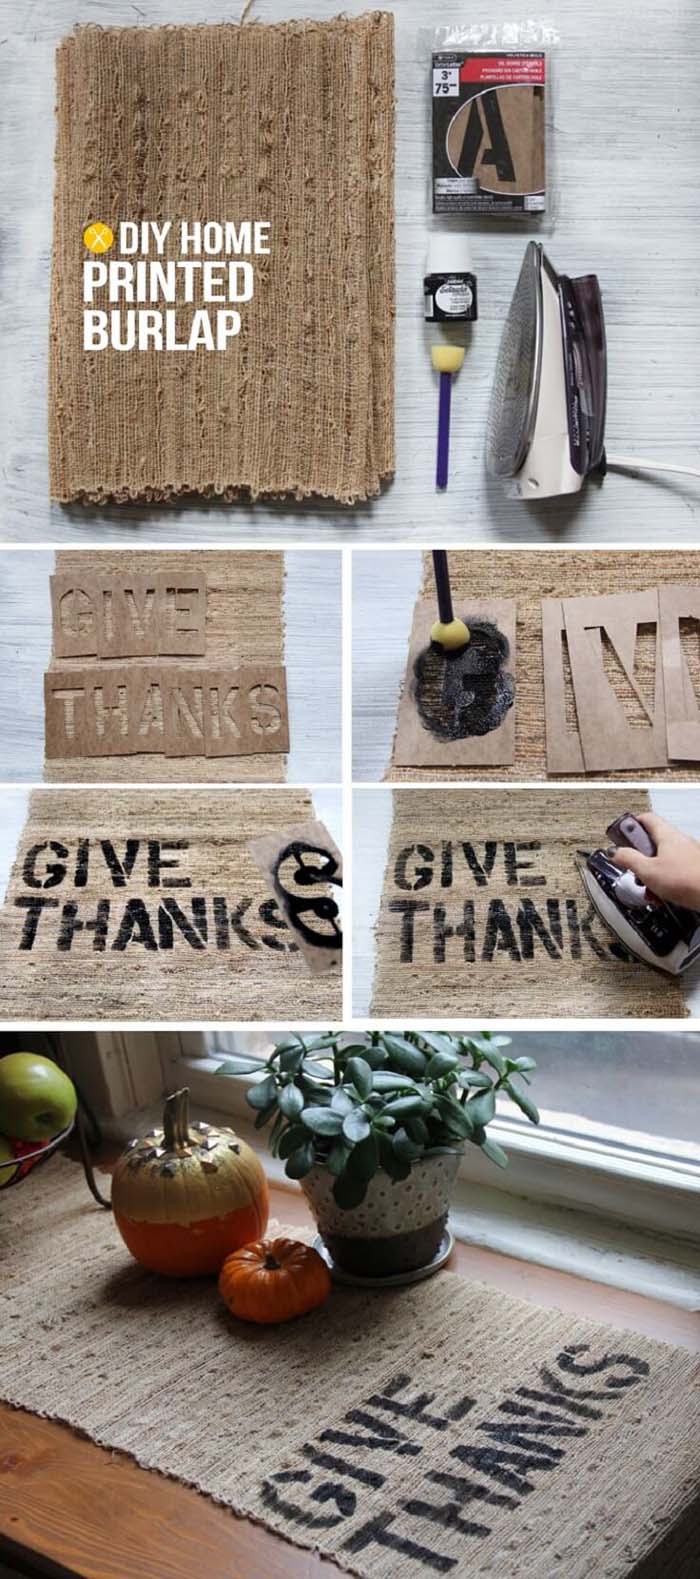
Stenciling on burlap brings an interesting effect to your home décor. You can use it on table runners, or any size fabric for furniture that you would like to reupholster.
Stick to primary colors such as red, black, and white.
via I Spy DIY
23. Make an Easy Garland with Hem and Serge Burlap Strips
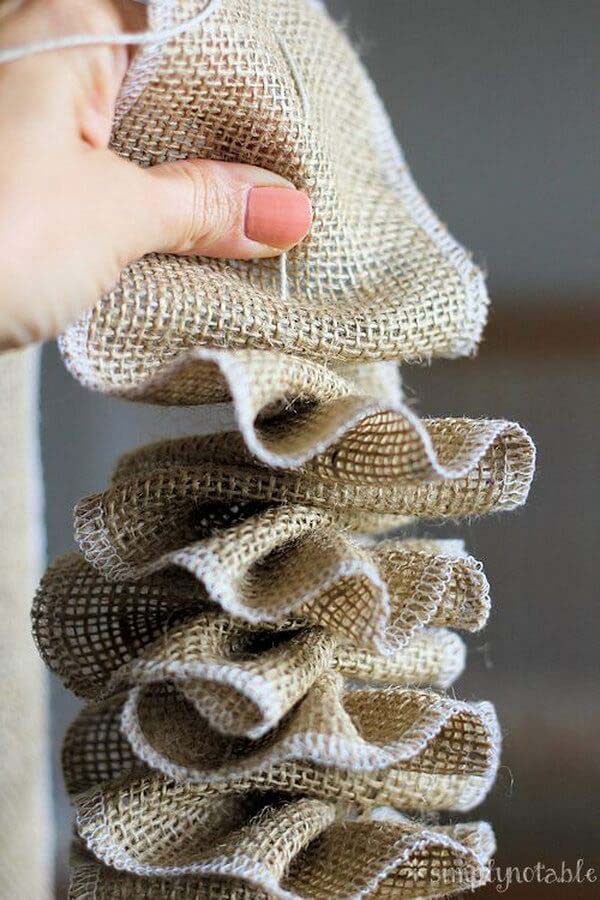
Hem and serge burlap strips. Created a long-running stitch through the center in a contrasting color of thread.
This will make gathering the garland easy.
via Simply Notable
24. Add Glamour to Your Pillows with Quoted Burlap Covers
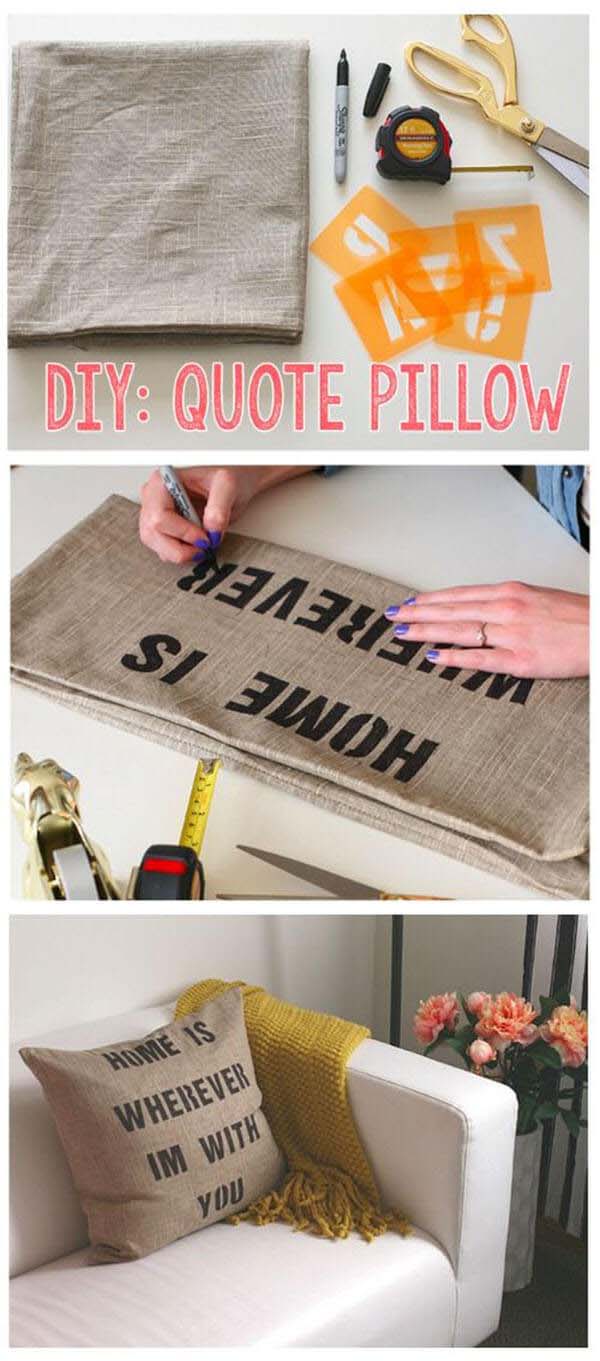
This is as easy as using a marker and stencils on a pillowcase. Practice it in pencil first. Go over the letters with a sharpie and fill them in.
If you don’t want to make a pillowcase, blank burlap pillow cases are available online. This is great for recovering old pillows.
via Momtastic
25. Step Up Your Decor Game with Lace and Burlap Garland
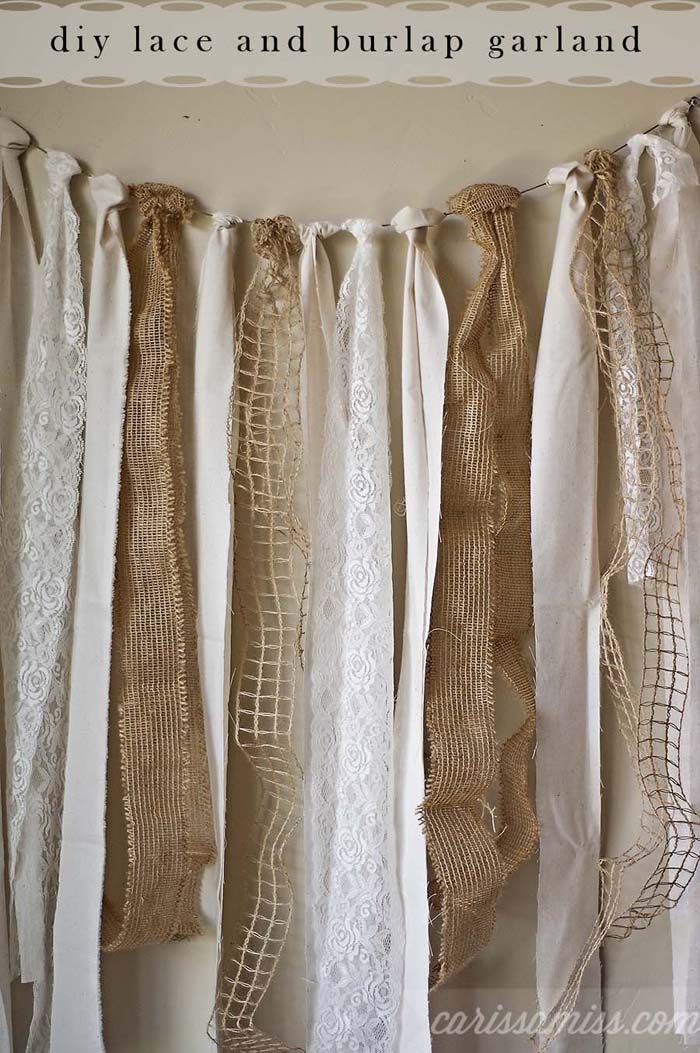
Ribbons made of lace and burlap are hung along a wire using a simple Larks head knot.
Try this for creating a sense of separation between two rooms or as a kitchen café curtain.
26. Rustic Atmosphere with Handmade Burlap Flowers
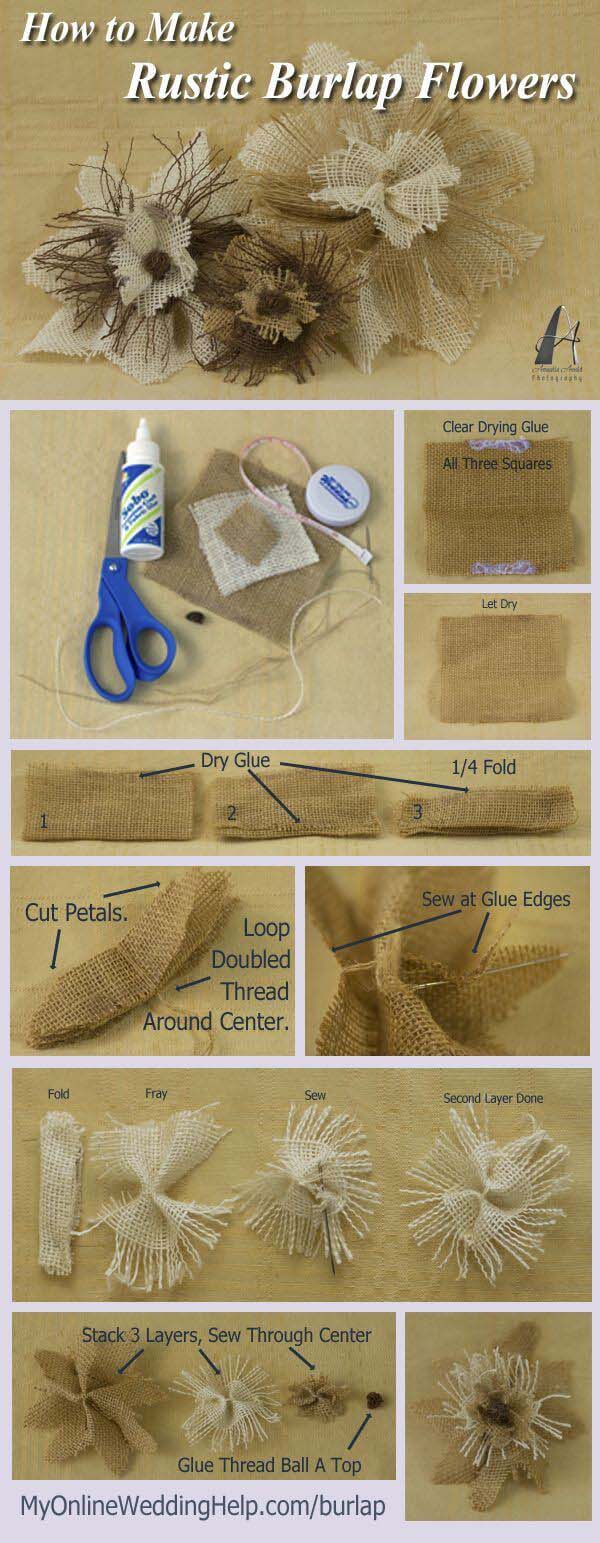
These flowers take a little time to put together, but the steps are simple. The results speak for themselves.
They were made for wedding decorations, but you can also use them as part of your home’s everyday décor.
27. Upgrade Monogrammed Letters with Burlap Cover
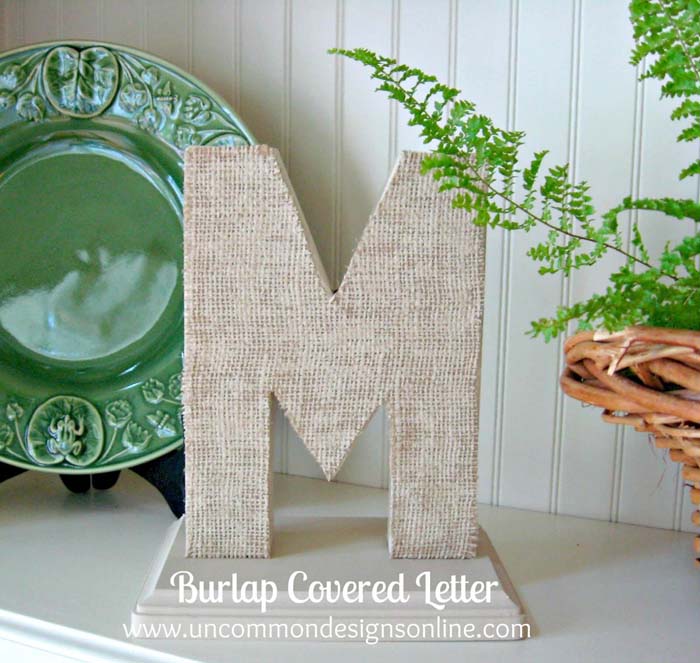
This is a quick and cute design for any country cottage home.
Use a papier mâché letter from the craft store. Glue the letter to a painted wooden base.
via Uncommon Designs
28. Be Charmed with a Simple DIY Burlap Bow
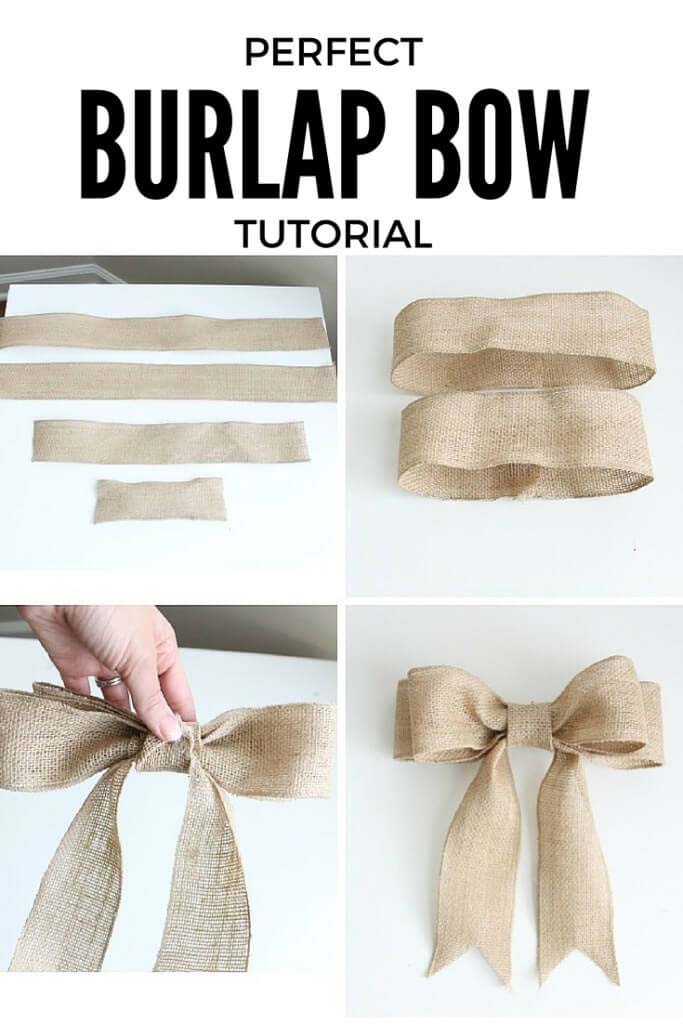
This is the easiest way to get a great-looking bow out of burlap ribbon. Don’t waste fabric trying to loop it, just cut everything into strips and loop two pieces for wings.
The two longest pieces form the larger wing and tail. The midsize piece is for the top wing, and the smallest piece gathers the wings together.
via Mommy Suite
29. Transform a Bedroom with Hand-Sewn Burlap Bedskirt
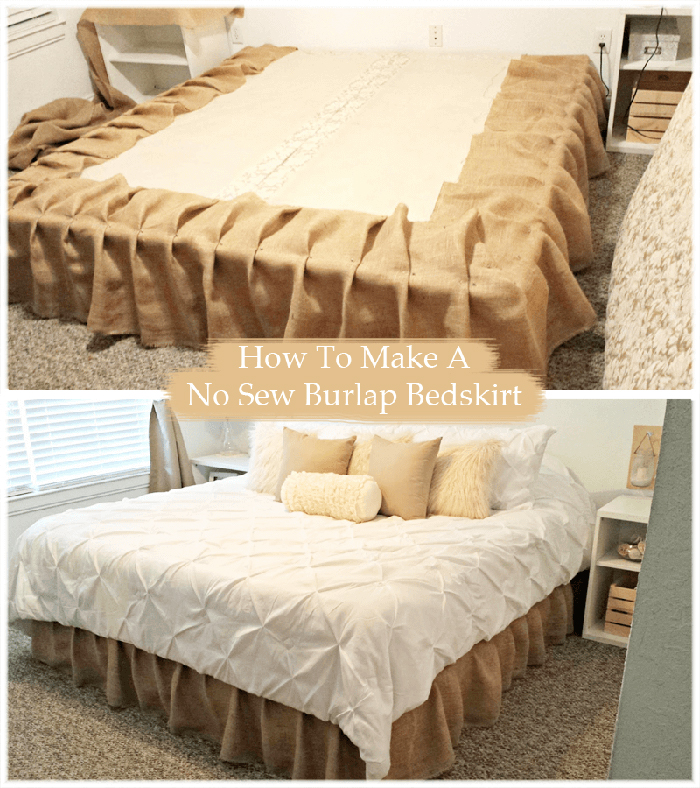
Five yards of burlap and some safety pins are all it took to make this bed skirt.
The weight of the mattress holds it in place. A hemmed finish is optional. It will hold up over time.
via Our Cozy Cottage

