Hardscape pathways add shape and decorative interest to vegetable gardens and landscapes as well as utility.
They offer tempting permission to enter among plants whether for weeding, plucking produce, gathering flowers for bouquets or simply appreciating color, textures and fragrance.
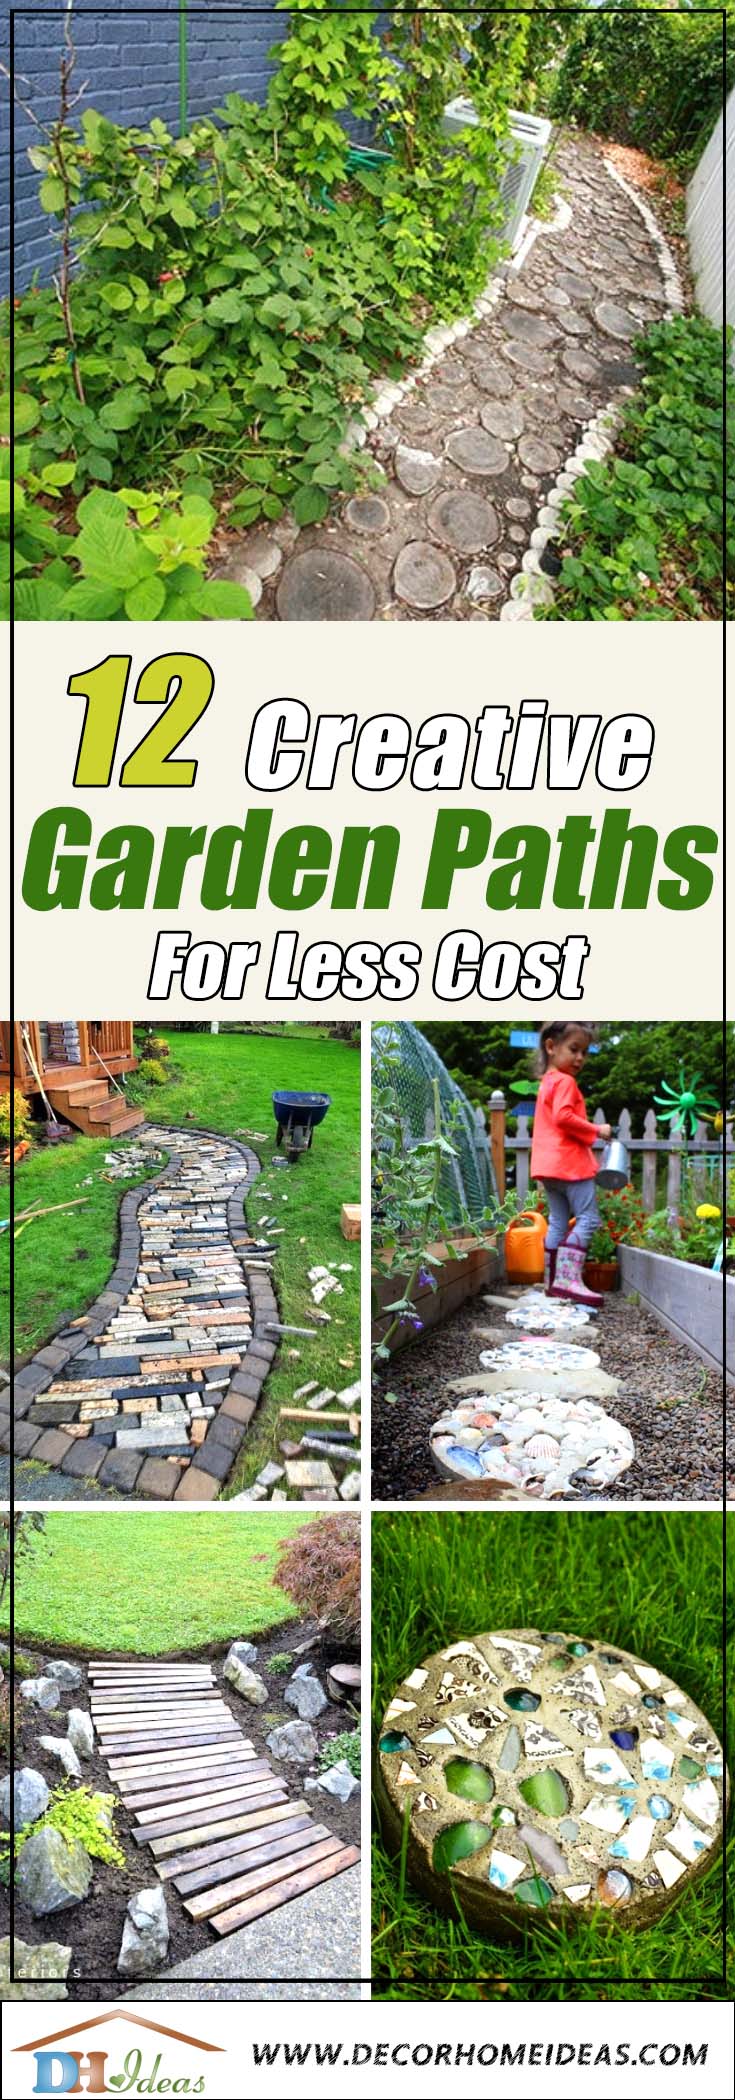
Formal paths created with stepping stones, paving, wood or gravel make it possible to avoid muddy shoes and trampling on the root zones of plants.
Here are 12 pretty and practical do-it-yourself projects for creating your own hardscape without a landscaping crew. Each one links to its designer’s tutorial.
The last two in the list include an elaborate combination of patio and path that encourages walking in circles and a simple yet elegant concrete staircase that looks like a sidewalk rising up a slope.
They demonstrate the broad range of possibilities for homeowners who decide to dress up gardens with pathways.
1. Lace Stepping Stones
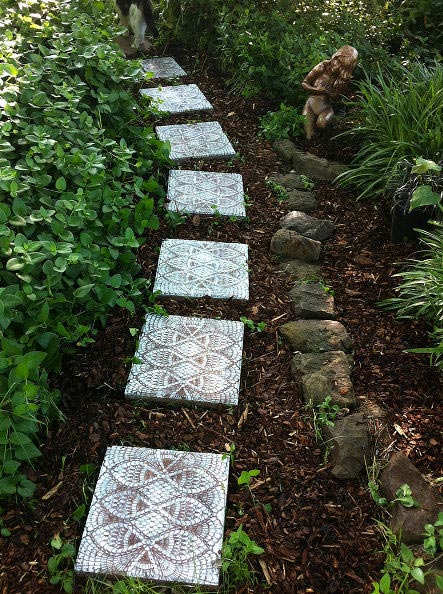
We love it because: Karen dressed up plain, concrete pavers by using a lacy plastic doily as a stencil.
How to DIY: This project requires concrete pavers in any shape over which you place the doily and then spray paint. Placing a cardboard frame around each paver before painting avoids spatters. A coat of exterior clear sealer finishes the job.
Our Suggestion: Lay the stones on a path of mulch to discourage weeds.
Full instructions here: Mindful Matters
2. Stenciled Stepping Stones
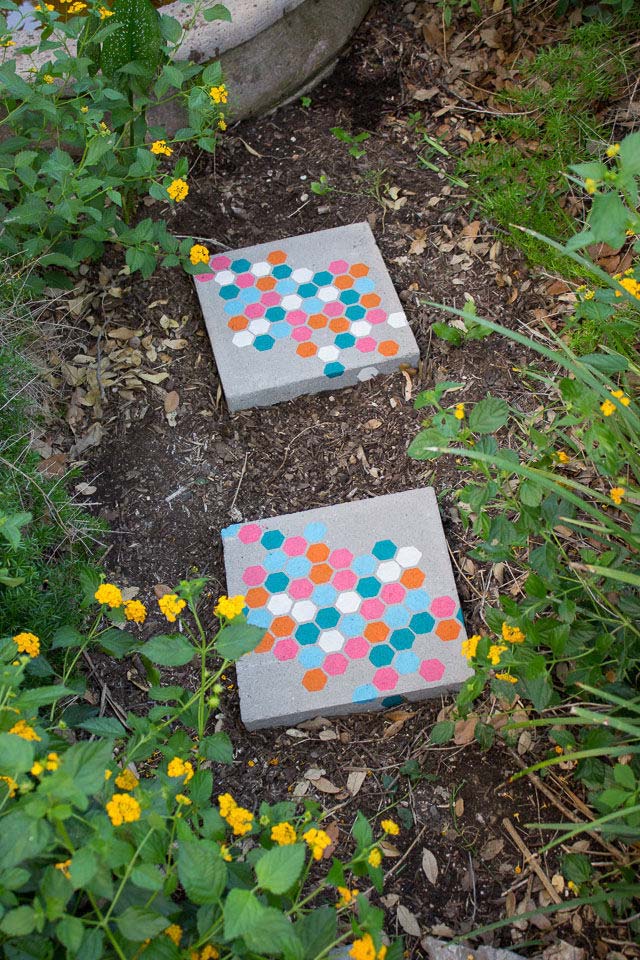
We love it because: The pastels are bright, and no two stepping stones are exactly alike in Haely’s garden.
How to DIY: A commercial, laser-cut, plastic stencil with a repeating geometrical pattern is necessary for applying a pattern to concrete pavers. You’ll need a foam brush for each color of weather-resistant, acrylic craft paints, which should be applied one at a time in a random pattern.
Our Suggestion: If you are new to stenciling, consider selecting a stencil with thicker borders around the shapes to avoid overlapping colors.
Full instructions here: Design Improvised
3. Endless Circles Patio Pavers
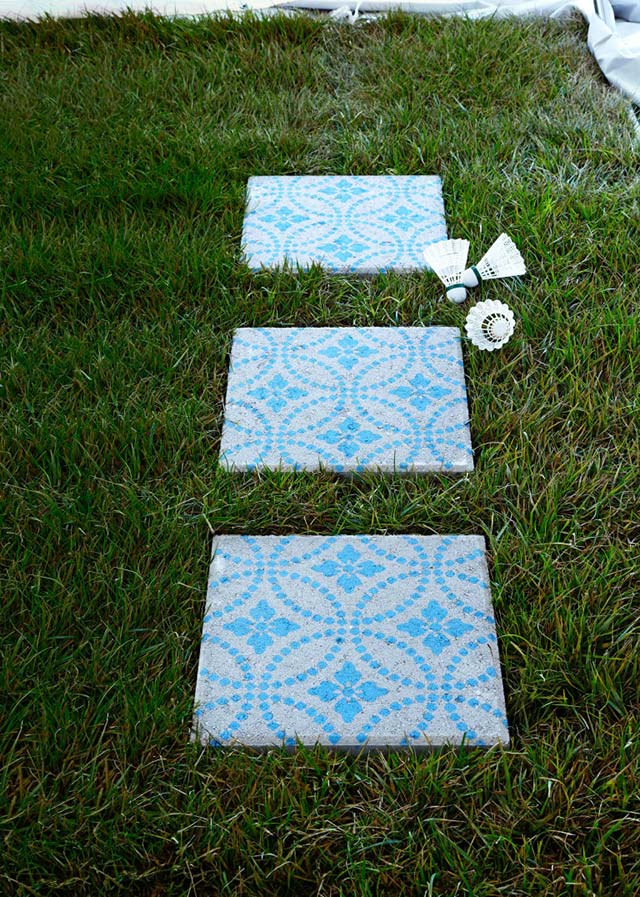
We love it because: Materials and steps are limited. The sky blue floral pattern of the Modern Masters “Endless Circles” stencil is elegant.
How to DIY: After removing debris from concrete pavers, you position the stencil symmetrically before painting. Country Living applied “Greek Blue” Annie Sloan chalk paint with a stencil brush, using straight up and down movements.
Our Suggestion: Visit the Annie Sloan website to see a wide variety of Chalk Paint colors. https://www.anniesloan.com/annie-sloan-products/paints/chalk-paint.html
Source: Country Living
4. Patterned Stepping Stones
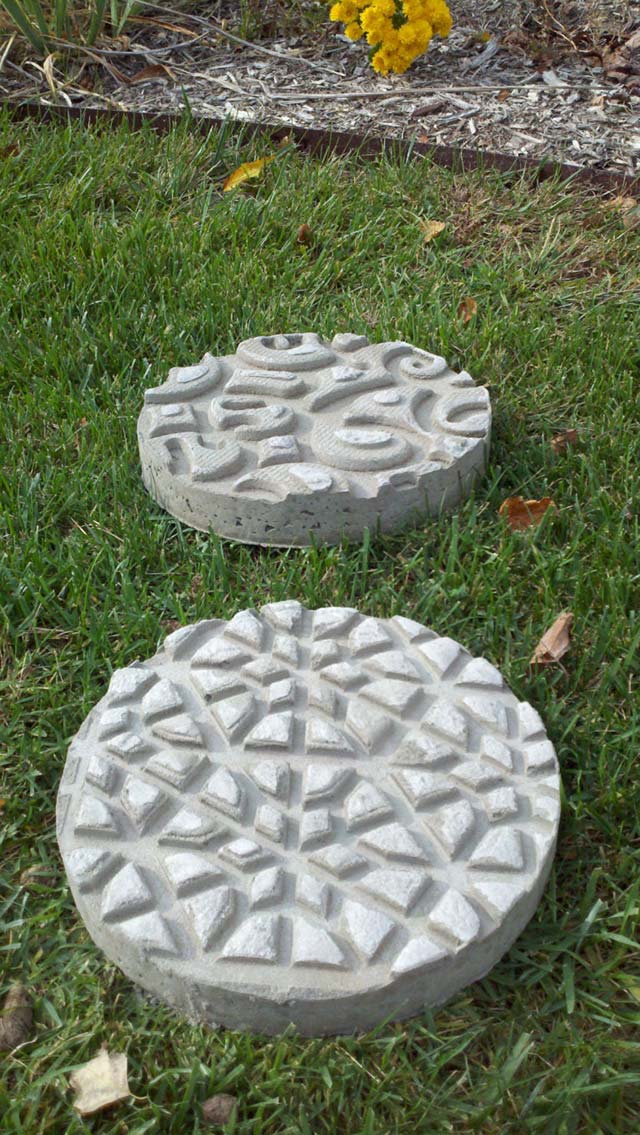
We love it because: The use of open-work doormats to create the raised patterns is clever.
How to DIY: The frames for these stones are 3-inch-deep rings of cardboard tubing, which are also used as templates for outlining circles on the doormats. Vegetable oil spray keeps the frames and doormats from sticking to the concrete. Before applying the doormat circles to the concrete, you need to let the concrete set for 45 minutes. The last step is to remove the doormat circles once the concrete hardens. It can take up to two days.
Our Suggestion: Make your path as elaborate as the stepping stones by placing them in a serpentine pattern.
Full instructions here: The Mizelle Group
5. Cake Pan Mosaic Stepping Stones
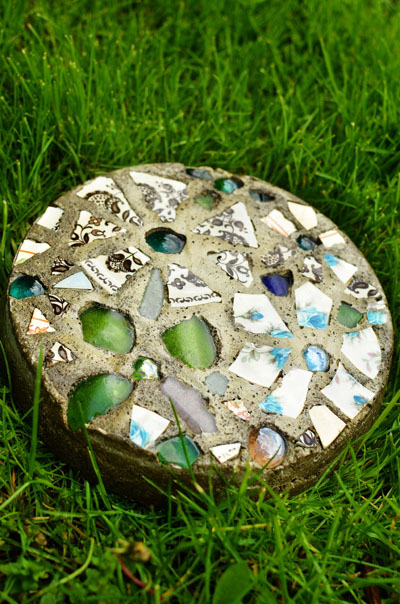
We love it because: It’s fun to break plates with a hammer and to create mosaics.
How to DIY: Put on safety glasses and place the crockery inside a cloth cover before swinging the hammer. The cake pan is both the stepping stone frame and a tool for outlining the right size circle of contact paper to put inside the pan as a sticky base on which to lay out the mosaic.
Add some glass jewels to the design for more color and texture. Before pouring in the concrete, you need to line the sides of the pan with petroleum jelly. After filling it half full, lay in a square piece of chicken wire to reinforce the block. Then fill it up to the brim with concrete. In two days, you can flip the pan over to release the stone and remove the contact paper.
Our Suggestion: Use an old pillowcase for holding the crockery while hammering.
Full instructions here: Intimate Weddings
6. Rock and Shell Stepping Stones
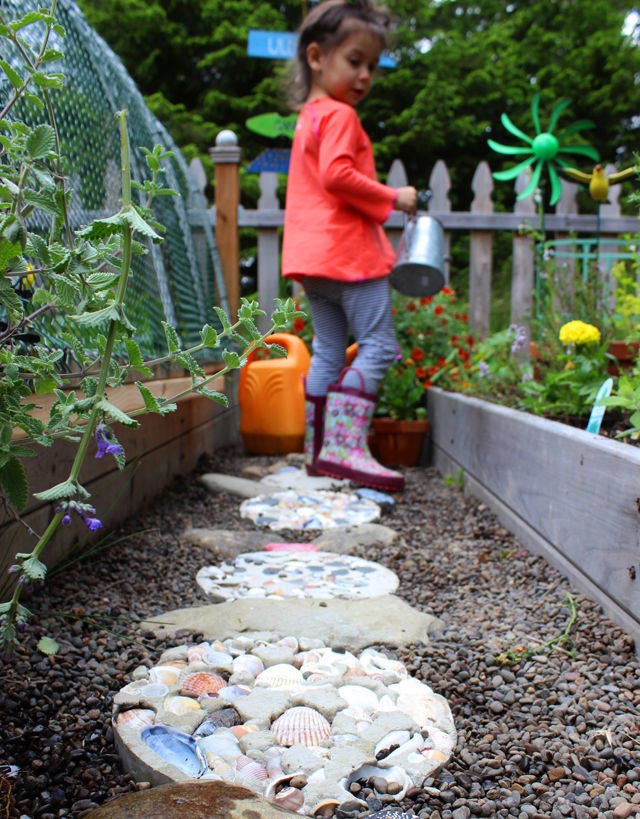
We love it because: It’s a fun way to use up all the rocks and shells collected on vacations.
How to DIY: Alison also uses cardboard construction tubing to frame her stepping stones. Before pouring the cement, she and her daughter arranged favorite rocks and shells in the bottom of the frames. When the stones were ready to place in the garden, she interspersed them with large river rocks.
Our Suggestion: It might be fun to toss in a few glass jewels for shine.
Full instructions here: Alisa Burke Redefine Creativity
7. Wooden Pallet Walkway
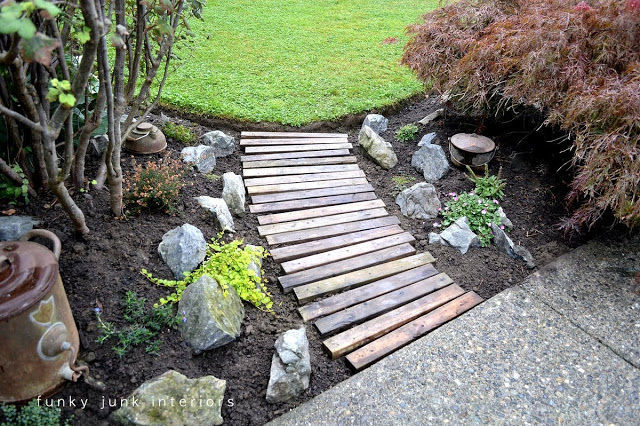
We love it because: This project repurposes commercial pallets that might otherwise end up in landfill.
How to DIY: Donna was planting a new garden with fresh soil raked flat and lower than the abutting lawns and driveway. This made it easy to have the right depth in which to lay wooden pallet boards all cut to the same length. She suggests leaving the boards loose so they can be removed for easy weeding and then reset.
Our Suggestion: Create a pea gravel path on which to lay the boards.
Full instructions here: Funky Junk Interiors
8. Pebble Mosaic Stepping Stones
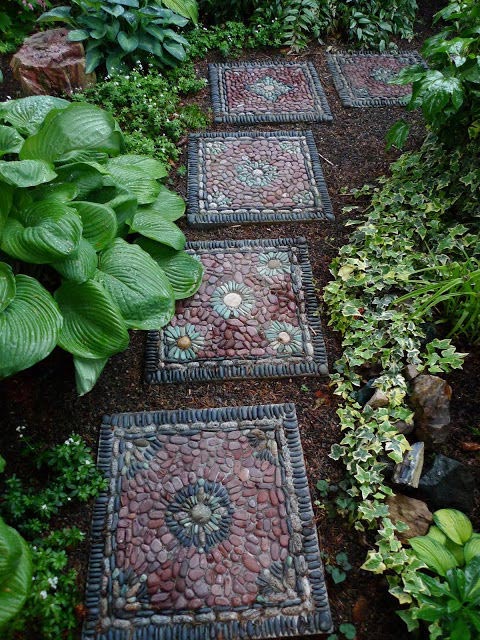
We love it because: The designer carefully considers rock color in the patterns he creates.
How to DIY: For his stepping stones as well as long walkways built in place, Jeffery first sorts small and large pebbles by color and shape. Then he designs a pattern before pressing them into mortar already in wooden frames. To gather the stones, he suggests visiting beaches, rivers and commercial rock yards to find a variety of colors and textures. It takes “meditative will” to see the color in rocks found in dusty stone yards, he says, so be patient and look closely.
Our Suggestion: This site shows some beautiful, complex walkways. Approach your project one stepping stone at a time.
Full instructions here: Jeffrey Gardens
9. Wood-Slice Pathway
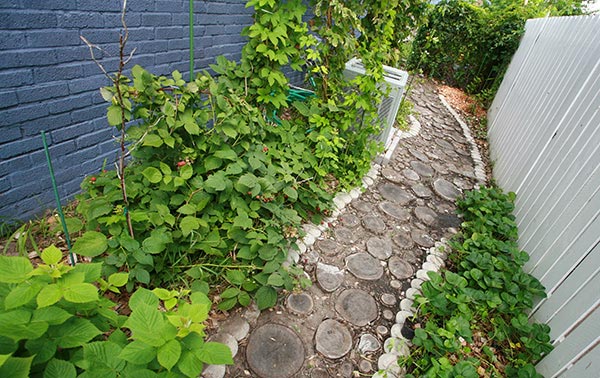
We love it because: The necessity of recycling a tree felled by a tornado led to this eco-friendly path through Marie and Porter’s side yard.
How to DIY: This is an ideal solution for recycling a tree when it needs to be cut down. If you are not in that situation, a neighbor may have the chunks of tree trunk and branches you will need. Marie and Porter’s first step was to remove sod from the side yard, create a level soil path winding through planting beds and delineated by concrete edging pavers. Then they cut up their fallen tree into 3-inch-deep rounds of wood. After placing the large disks in a random pattern along your path, you can fill in with the smaller rounds. The final step is to fill the spaces between the disks with soil to create a level walkway.
Our Suggestion: Use smooth river rocks to cobble the edges of your path.
Full instructions here: Celebration Generation
10. Countertop Scrap Path
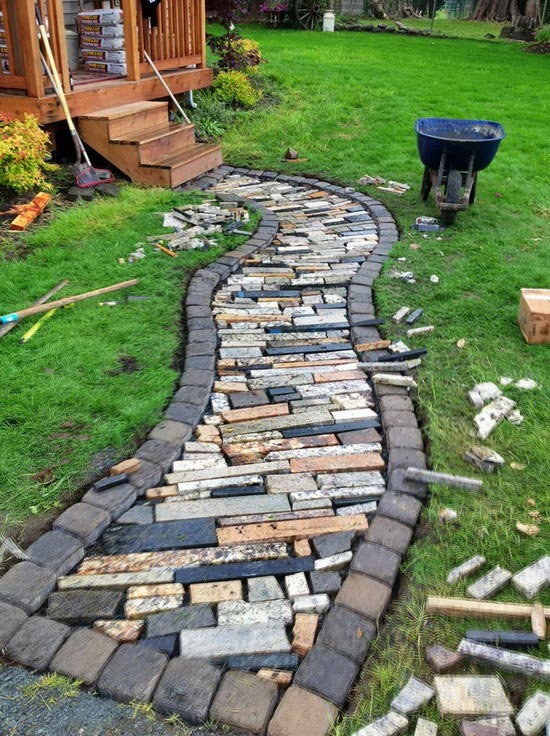
We love it because: The varying shapes and hues of the granite remnants create a surprisingly colorful path.
How to DIY: Purchasing a load of granite countertop remnants is inexpensive, according to DIY publisher Remove and Replace. First, remove sod for your pathway, then level it with gravel. Line the sides of the path with concrete edging. After applying mortar to the gravel path, you can begin pressing in the pieces of granite. When the mortar dries, the final step is to seal the remnants and create a level path by applying grout between the pieces of stone.
Our Suggestion: Add shallow borders along the sides of the path for short, flowering perennials.
Full instructions here: Remove and Replace
11. Whimsical Mosaic Patio Path
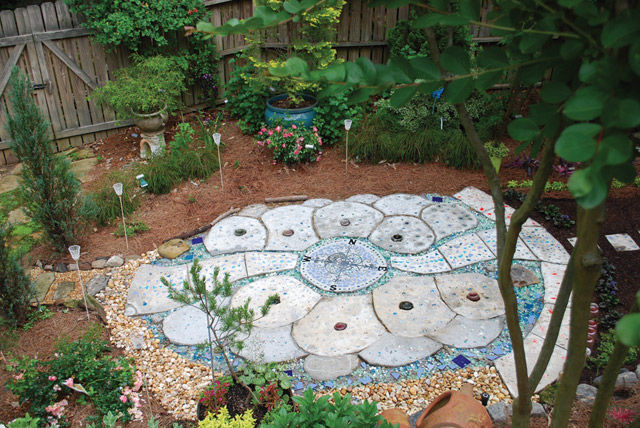
We love it because: Shannon’s design swirls larger and larger from its central compass rose to become a patio through which a pathway flows into the garden beyond.
How to DIY: First, sketch a rough plan of what shapes you want to combine for the patio. After defining the patio’s edge with a rope, you can either kill or remove the grass it surrounds. The next step is to use spray paint to outline the paver shapes forming the patio, beginning with a center circle. Watering the ground to soften it overnight is helpful before digging narrow trenches in which to fit cardboard frames for the concrete forming the pavers. The design will look like wavy spokes on a wheel. Construction proceeds one paver at a time. Lay out the pattern of mosaic materials next to a paver before pouring and troweling concrete in a frame. Then it’s time to apply the pebbles and other materials. The pavers dry within 24 hours, but the patio won’t be ready for furniture until the concrete cures for a few days. Meanwhile, select one of the spokes of the patio off which you want to continue a trail of stepping stones.
Our Suggestion: Create a construction calendar before beginning work.
Source: Pennsylvania Gardener Newsletter
12. Sidewalk Stairway Path for Slopes
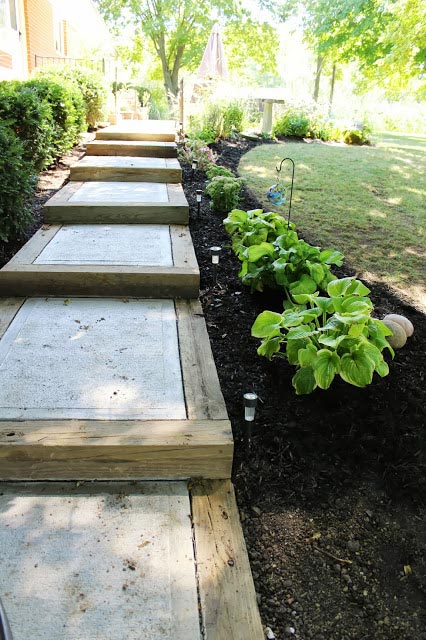
We love it because: This is an elegant solution for creating gently rising paths up slopes.
How to DIY: Elizabeth built a gradually ascending series of sidewalk-like steps from her garden-level garage to the first-floor entry of her home.
She framed the slabs with discarded, pressure-treated beams. One of the first steps in this kind of project is to measure the rise over run – the ultimate height of the path and the distance it travels to get there.
Then you can calculate the length, rise and number of the steps. (The depth of Elizabeth’s beams determined the depth of her steps.)
Except for the first step, which Elizabeth braced against the concrete pad of her driveway, she placed the front of each step on the back of the preceding step. To build the frames, she suggests using L-brackets to reinforce each corner.
After securing the frame of each step to the ground with rebar, you’re ready to place the concrete underlayment of limestone gravel. Then it’s time to bring in a contractor to pour the concrete.
Our Suggestion: Elizabeth’s son worked in construction and provided the salvaged timbers. You may be able to find inexpensive sources online or through local construction companies.
Source: Ohio Thoughts
We want to offer one last suggestion: Walks around your neighborhood or other communities offer opportunities for inspiration.
So, when out and about, keep your smartphone with you to photograph elements of hardscape you would enjoy in your own yard.
13. Mosaic Garden Path
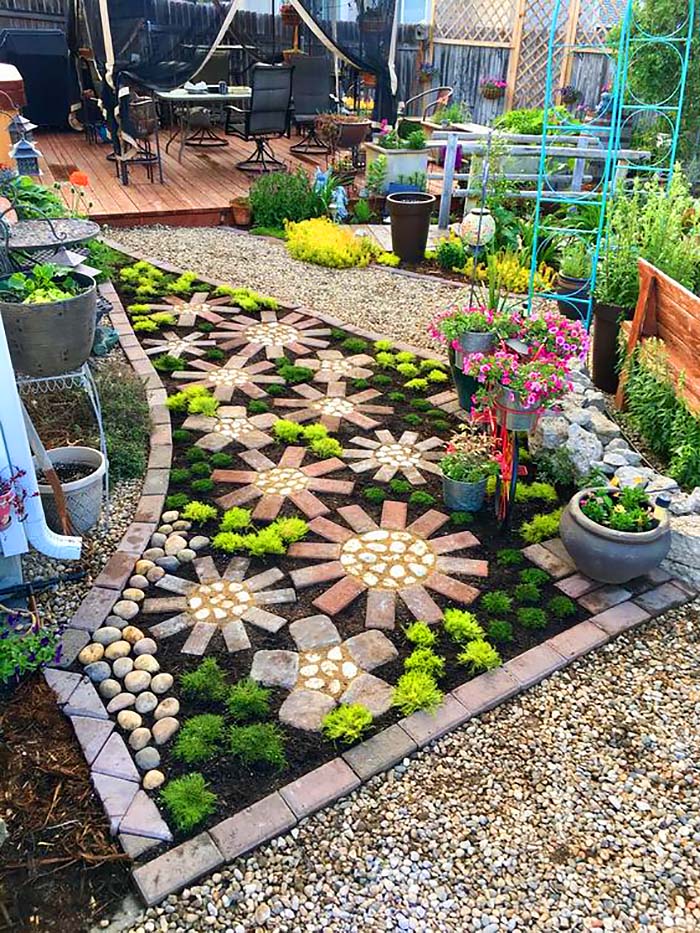
This enchanting pathway transforms the garden into an artful tapestry with its mosaic pattern of stones and lush ground cover.
The innovative design creates a playful interaction between hardscaping and softscaping, inviting visitors to meander and admire the creativity that turns a simple walk to the patio into a delightful visual experience.
Take a look at these 17 Charming Pathways To Make Your Garden The Best In The Neighborhood

